
Pinball Alley
Pinball Alley: Rollerball
To most people, Rollerball evokes memories of a 1975 film starring James Caan that was centered around a violent sport and one man’s fight against corporate control. It’s a pretty good movie, but the Rollerball that I have in mind is much different…
Rollerball is a 1988 pinball game for the Nintendo Entertainment System that is an all-original experience with New York City as a backdrop. The playfield spans four full screens, which is double what Nintendo’s Pinball game offered. If you put each playfield on top of each other to create an actual pinball table, it would be massive. It’s perfect for the “skyscraper” motif that represents New York City here, along with other touches like a sighting of the Statue of Liberty and the use of a big apple in the mode select screen. The plunger area even has the words “CHALLENGE THE SKYSCRAPER” in the ball launch alley. Rollerball tries to give players the illusion that it’s pinball experience– like the Big Apple itself– is larger than life… and it succeeds, at least early on.
With four distinct playfields to break down, I’m going to start where Rollerball starts players after the plunger launch, which is what I’ll refer to as the “third floor” of four. I’ll then take you to the roof level, or the top floor, before descending to the second floor and finally the ground floor. Covering the playfields in this fashion will also simulate the general flow of the game, as if we were playing it, and will hopefully allow players to formulate strategies for higher scores.
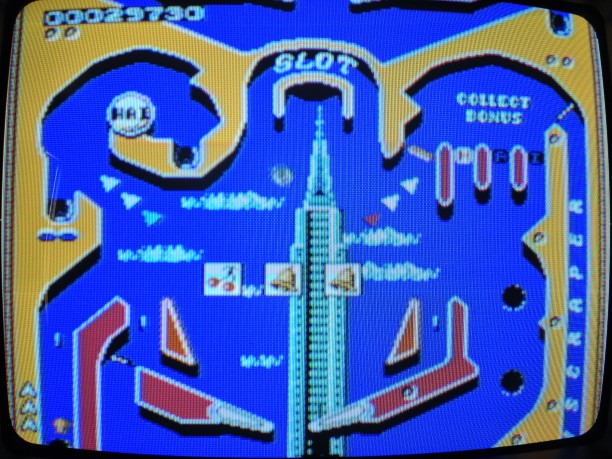
Going up! Third floor… slot machines, bonus points, and capture holes!
The third floor of the Rollerball table is where the action begins after the ball is launched into play. There are several features of note, including a SLOT slingshot rollover at the top center of the playfield, HAL light lanes in the upper right, a curved capture area in the upper left with two different outholes, and a tunnel just underneath the SLOT slingshot. There are also capture holes in the lower right portion of the playfield and a variable-direction capture hole at the bottom of the left outlane.
There are several ways to approach the third floor. The first strategy is to try and shoot the ball straight up through the tunnel just underneath the SLOT slingshot. If done correctly, this will move the ball up to the roof level, where big bonuses await. Players must be careful with their shot selections here, however; missing the tunnel just to the left or right and hitting the sides can send the ball careening quickly back towards the flippers and possibly draining down the center and to the second floor. The second strategy is to continually hit the SLOT slingshot and try to get lucky. If a spin nets three Bells, the outhole bonus multiplier increases by 1. If a spin nets three cherries, saver posts will appear in two places: blocking the left outlane on the roof level and blocking the drain down the middle on the ground floor. In addition to the saver posts, gates will open on the same two levels: on the right outlane on the roof level and on the left outlane on the ground floor. While the cherries aren’t as helpful for scoring purposes as the bells, the saver posts and open gates will help to extend the length of a player’s turn and allow for more potential points to be scored. Another strategy is to try and use the top capture hole in the upper-left capture area to warp to the roof level. This strategy is risky because the HAL bumper in that area can be unpredictable and may send the ball in unexpected directions. Finally, lighting all of the HAL lamps in the upper right instantly collects whatever outhole bonus has been accumulated. This can be especially beneficial if a player has been on the same turn for some time and that outhole bonus is substantial. Be warned, though, that these HAL lanes can sometimes drain the ball down into the second floor of the ball doesn’t land in one of the two capture holes underneath.
Since the primary strategy should be to shoot the ball up and reach the roof level, let’s visit that playfield next.
Roof level… extra balls, multiball modes, bonus multipliers…
The roof level is high-risk, high reward. The high risk comes from the propensity to draining that the ball demonstrates here, thanks to the curvature over the two outlanes and the slightly larger gap between the flippers here. Draining the ball here drops the ball to the third floor, which will require another accurate shot to see a return to the roof and a continuation of task completion. The rewards here at the top are significant, however, and deserve a player’s attention if high scores are to be achieved.
When players first hit the roof, table lamps spelling the words SKY HIGH will catch attention. Rolling over each of these lamps will spot (or light) the letter, as long as it’s flashing. If the letter isn’t flashing at the time of rollover, points are collected but the letter will remain unlit. Lighting all seven letters enables the capture hole at the top of the screen, which can only be hit with precise shots curving around to the left or to the right. This isn’t an easy shot to execute, and pressure builds a bit after spotting all of the letters and knowing that this is the next shot to make. Once the ball enters the capture hole, here’s what players will see:
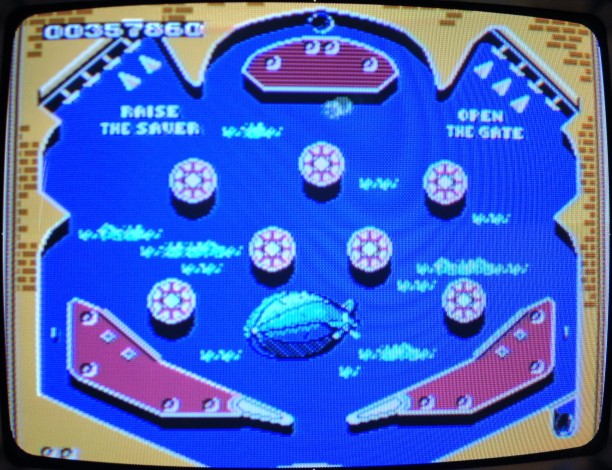
Wild bumpers appear! Gotta pop ’em all!
Note the series of seven bumpers that appear where SKY HIGH once were. The challenge now is to hit each of these bumpers enough times so that they explode. The ball reacts violently when making contact with these bumpers, so players must be at the ready with their flippers to deflect balls back into play before they drain. There are targets to hit along the upper left and upper right corners of the playfield; if all targets in a bank are dropped, one of the two outlanes will receive some sort of protection. The upper left bank of targets rewards players with a saver post over the left outlane, while the upper right bank opens the gate at the bottom of the right outlane. Activating these protective features will make popping the bumpers a much easier task and enable them to shoot for the next goal, which is another shot to the top-center capture hole after all of the bumpers have been dispatched. Completing this task earns an extra ball the first time, and then bumps up the bonus multiplier by 1 each successive time afterwards– up to a x5 multiplier.
There’s also one additional bonus feature which becomes available once the bumpers are gone: multiball. Locking the first ball for multiball is the hard part, as it requires a ball to fall down the right outlane into the open gate. Then, after the second ball in launched, getting it up to the roof level starts the multiball sequence. This multiball mode is a bit derivative of others in that it’s fairly easy to manipulate. Here’s why: Losing one of the two balls during multiball from any of the three upper playfields– second floor, third floor, or roof level– puts the lost ball into suspended animation until the other ball drains. This is advantageous in that it’s easier to track one ball instead of two and basically adds an “extra life” for each playfield on which multiball play takes place. Even with both balls on the screen at once, it’s not overly difficult to track them and there’s less pressure to do so in most instances. Once both balls are active on the ground floor, however, things get dicey as any drains there end the multiball mode… and draining both balls here ends the player’s turn.
While the third floor and roof level are where players will want to keep the ball in play, there are still two playfields to cover. Let’s look at the second floor next:
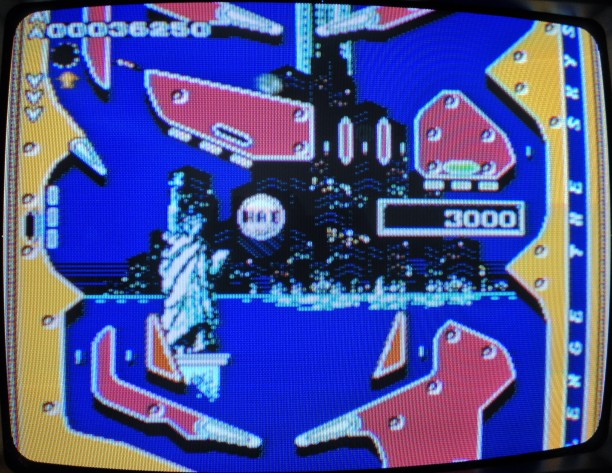
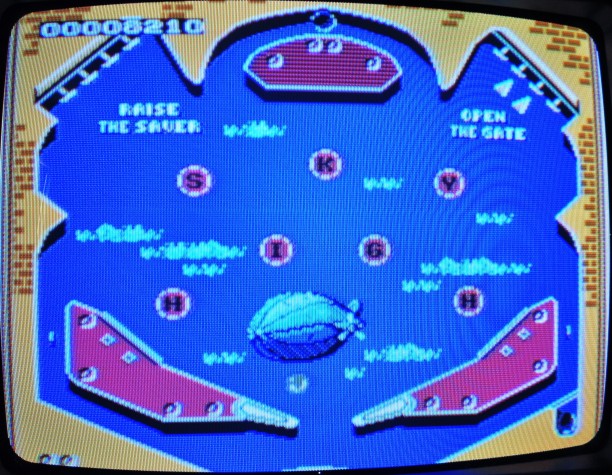
Second floor… Drop targets, lamp lanes, and the Statue of Liberty…
Pressure builds a bit here on the second floor because players are one step closer to the bottom. In addition, the layout of this playfield isn’t conducive to much scoring. The best play here is to shoot for the variable capture hole in the far upper left. If the arrow is pointing up, the ball will launch from the hole up to the third floor and this is the easiest way to get back there. If the arrow is pointing down, however, the ball will launch down the table and towards the flippers. There is a flipper just below that capture hole, and it’s best used to hit the middle bank of drop targets should the player choose to do so. That bank is one of three banks of drop targets, and the “active” bank is the one with the pulsating green light next to it. Dropping all targets in this active bank increases the bonus point total on the right side of the playfield. This point total can then be acquired by getting the ball to go down the correct lane of the three situated between the second and third target banks. It’s usually not worth the effort to grow this point total, as the drop targets aren’t really easy shots, but this does give players at least some kind of scoring option on this playfield.
Three floors down, one floor to go… and this is the toughest of them all. One mistake, and it’s the end.
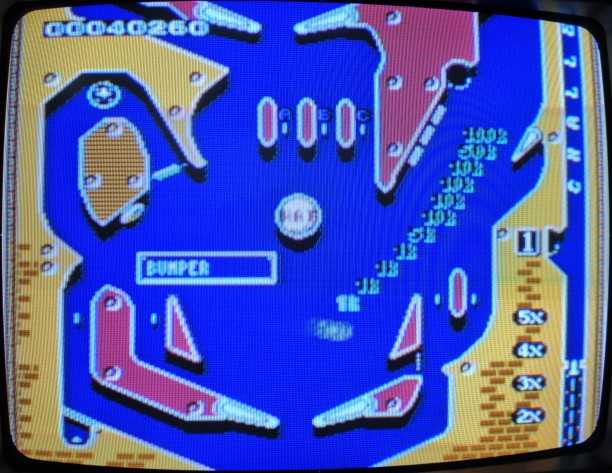
Bottom floor… outhole bonuses, drop targets, imminent danger…
The bottom floor is Rollerball‘s ultimate gut check. If players can’t get the ball back to the second floor and if if drains down the middle or down the left outlane, the turn ends and the game could be over if there are no extra balls in reserve. This adds a lot of pressure on players to try and shoot the ball skyward once again, but this is not easily accomplished. As the screen above shows, shots up the middle and back towards the second floor are blocked by a HAL bumper and a curvature surrounding the orbit just to the left. Lucky shots can sneak back up there, but the best play is a cross-field shot from the left flipper up the right side, following the outlane bonus numbers. This still requires a strong and accurate shot, but is the more consistent play. There is a bank of drop targets along that right side, along with a flipper for guidance. Eliminating these targets raises a saver post between the flippers at the bottom of the playfield and all but eliminates one drain option. There’s also a capture hole just above these drop targets; putting the ball there when the EXIT HOLE option is lit warps the ball back to the plunger area for return to the third floor.
Aside from that shot to get back to the second floor, this playfield has two areas of interest. The first is the orbit located in the upper left. A spinner guards the entrance to the orbit and each spin changes the lit option displayed just below it. After going through the spinner, a rollover lamp will execute whatever option is lit at the time. This option can range from big points to activating a saver post between the flippers to opening the gate at the bottom of the left outlane. Making this orbit shot is relatively easy, but players need to remain cognizant of the ball’s path on the other side of the orbit to make sure it doesn’t drain. The other area of interest is the line of A-B-C lanes just above the HAL bumper. Completing this A-B-C sequence opens the gate at the bottom of the left outlane and provides some drain protection.
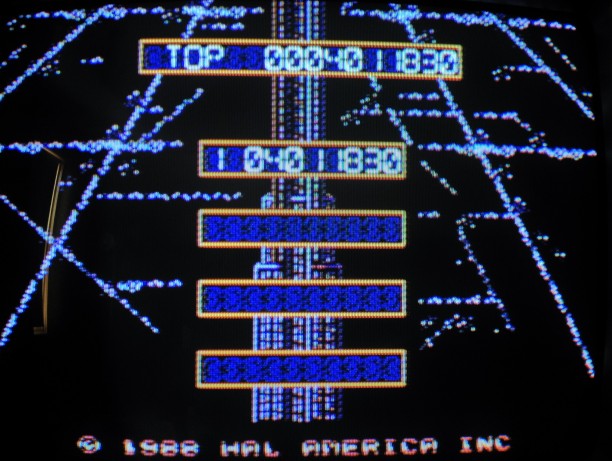
Here’s my best effort from the gameplay phase of research for this piece. Can you beat it?
In terms of achieving high scores, the best advice I can give is to keep the ball as high up on the playfield hierarchy as possible. The roof level provides the greatest rewards and, with a bit of work, can earn players an extra ball and boost the bonus multiplier to maximum. These two bonuses are key. In addition, the roof level is the only way to get multiball started and multiball here is the easiest of any of the NES pinball games that have it to take advantage of. I also advise learning shot timing and where the ball needs to be on flippers in order to execute. This is especially key on the third floor as shots not too far off the left flipper hinge tend to aim naturally up towards the roof. Learn that timing, resist feelings of pressure as the ball treks down towards the bottom floor, and be prepared mentally for a battle of endurance if your level of play reaches “the zone”. My best effort of more than 4 million points could have been better, but I got tired and made silly mistakes.
Rollerball still holds up very well today. It’s a great original effort that compares favorably with RARE’s real-life pinball ports, plus it’s a very accessible game that encourages high scores and utilizes many of the tenets of successful pinball design. Rollerball builds on Nintendo’s Pinball effort by adding multiball, bonus multipliers, and outhole bonuses. The ball physics are a bit lighter than in Pinball, but this doesn’t detract from the game’s overall quality. The graphics are a nice homage to New York City, both during the day and at night, and the music is top-notch… although the loop during a lengthy scoring effort might drive some players a bit nuts. It’s a candidate for my favorite NES pinball game, but there are still a few games to cover before I can let that ball out of its capture hole.
Finally, one last piece of trivia before I close this column:
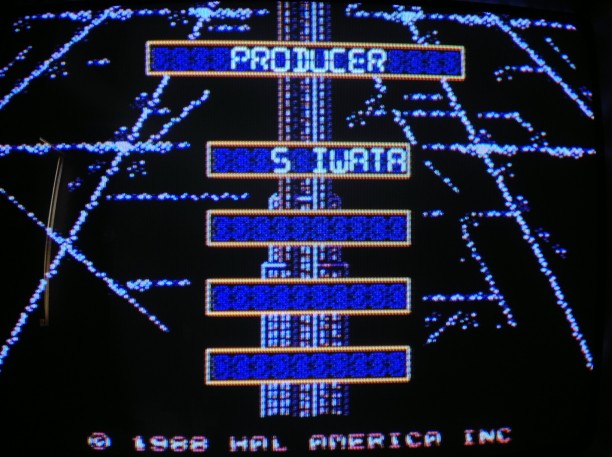
Why does this name look so familiar?
Does that name look familiar? It’s none other than Satoru Iwata. Yes, that Satoru Iwata, current head of Nintendo and friendly face behind the “Iwata Asks” segments that we see online today for 3DS and Wii U. It was remarkable to me to see this link surface; in fact, I literally did a double-take when I saw the name in the credits while gathering my notes.
I hope you enjoyed this latest Pinball Alley effort. I’d love to hear about your own experiences with Rollerball, or even if this piece might have convinced you to seek the game out or give it a try. Please share in the comments below if you’d like. In the meantime, I’m off to pick the next game to cover. See you next time!
Peter Skerritt
Peter Skerritt has been playing video games for more than 35 years, starting with a home-based PONG machine and stretching all the way to the consoles of today. He’s also been writing video game-related pieces since 1999, ranging from video game reviews to analysis of console video game hardware and software sales. Through the years, Peter’s had a soft spot for the Nintendo Entertainment System, which he recognizes as his favorite video game console. He is also a fan of pinball-related video games, which is the driving force behind his Pinball Alley series of articles.
See all posts by Peter Skerritt