The Completist
The Completist Presents: The Guardian Legend – Part 2
Just a word of warning before I begin:
Welcome back! Part two of my epic two part tale of “The Guardian Legend” is upon us. And oh what a tale it is! In my last article I covered my personal experience discovering the game as a child, the dark sci-fi inspired story and what little history is known about the game. But this time around, I’m going to take you deep into the heart of Naju, where enigmatic and sinister beings await with pronounced agitation. It is one wild ride, so I hope you’re ready.
Let’s start right where I left off in part one. You are on your way to Naju slipping through space at warp speed, blasting through a cryptic and dangerous security system and landing in a mysterious room on the planet’s surface. And it is at this point that the game drastically switches gears and we discover where the real “meat” of “The Guardian Legend” takes place.
A Savage World Filled with Useful Items
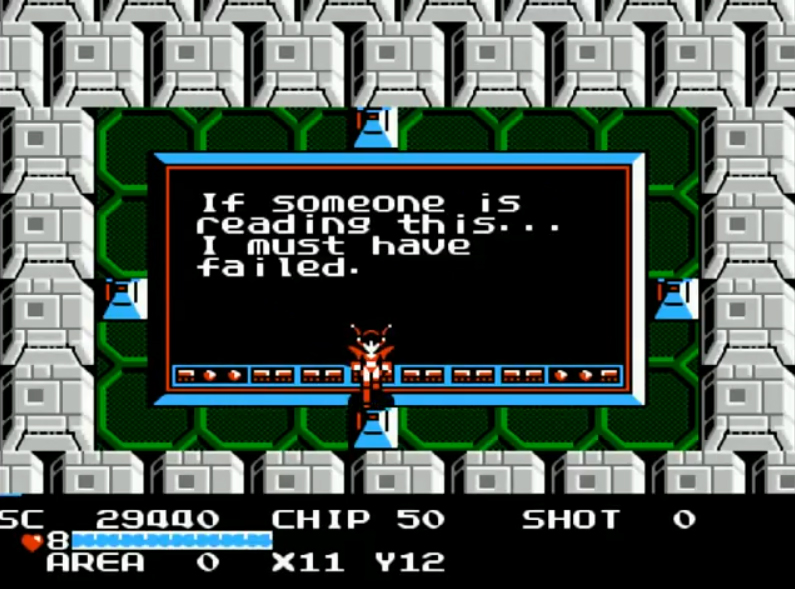
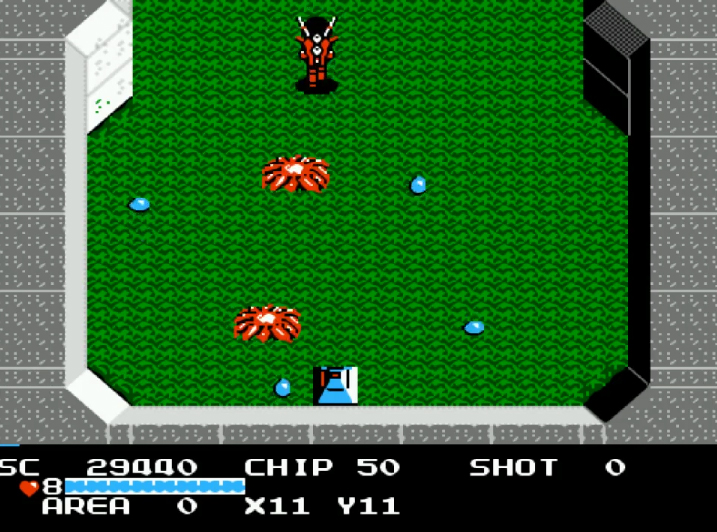
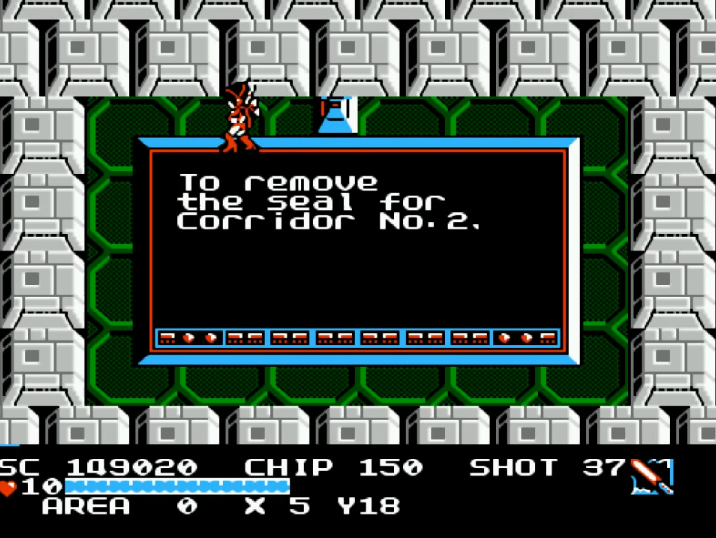
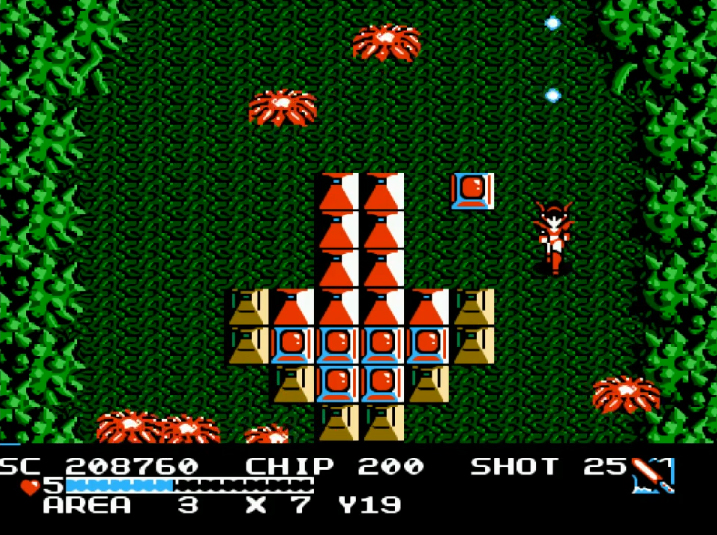
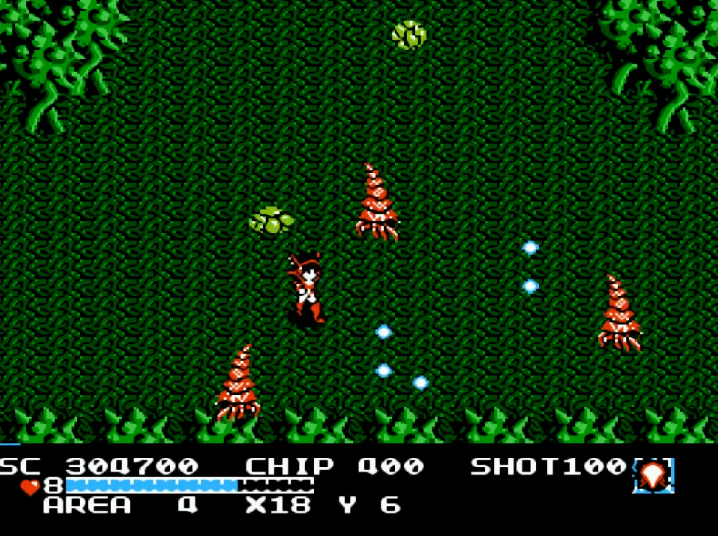
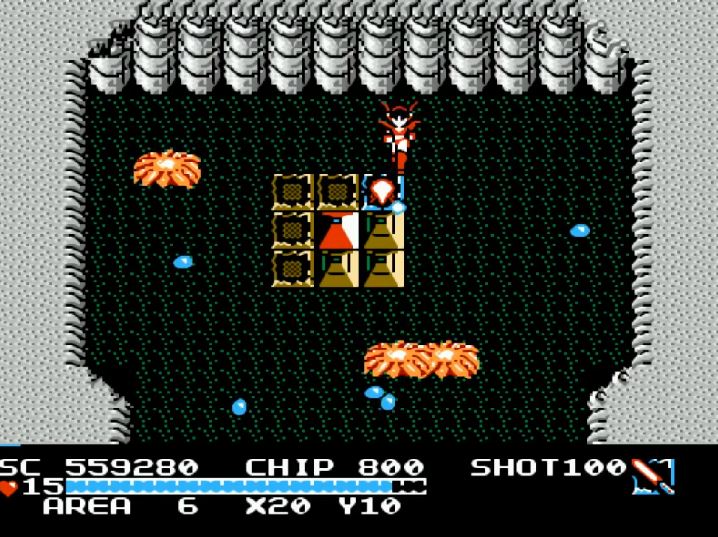
Recall the moment I described where you receive that cryptic message upon landing on Naju. It’s at this moment that you realize that you are no longer in a space ship but are instead controlling a female cyborg named Alyssa who is now in humanoid form. I put this screen shot in part one but I’m going to add it again because it is such an important starting point for this game:
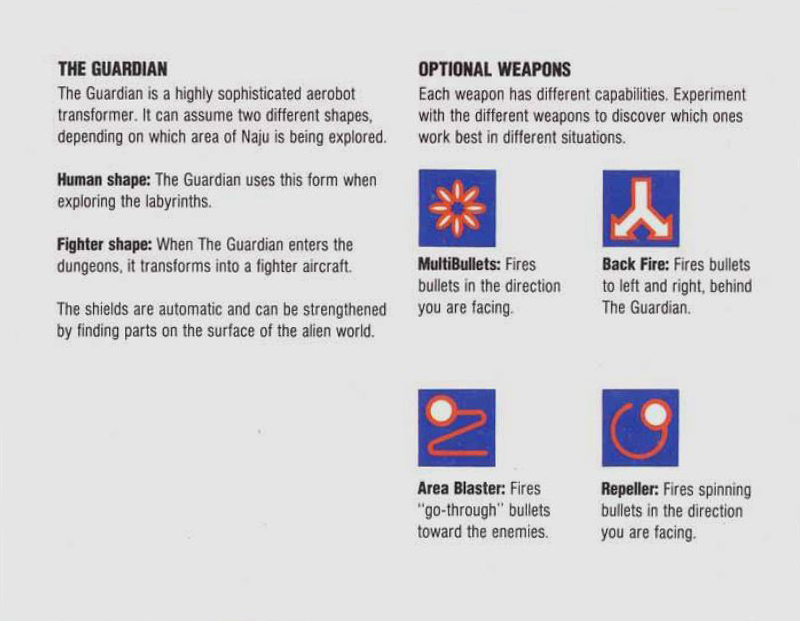
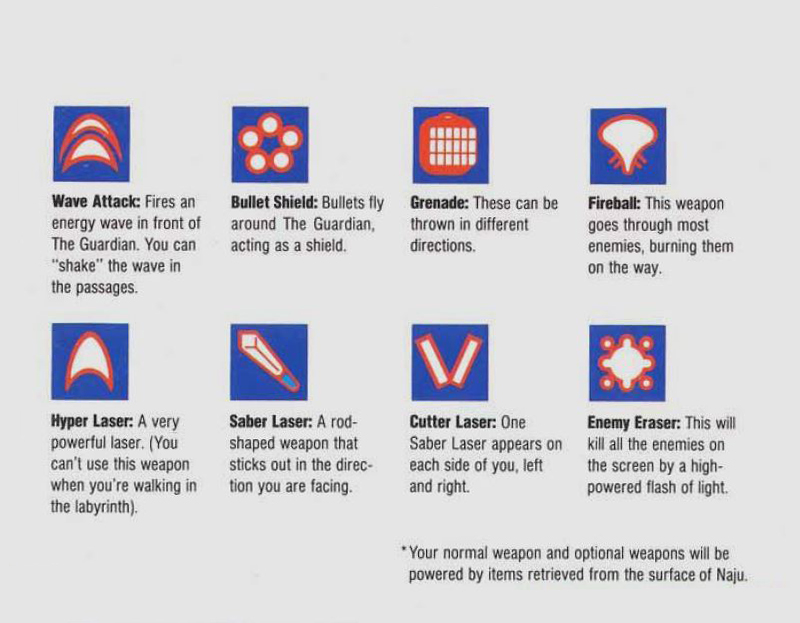
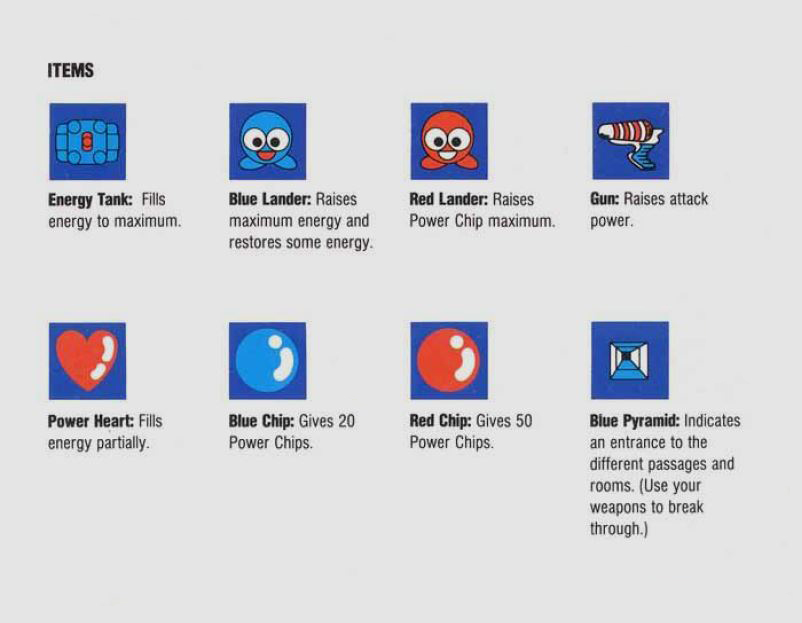
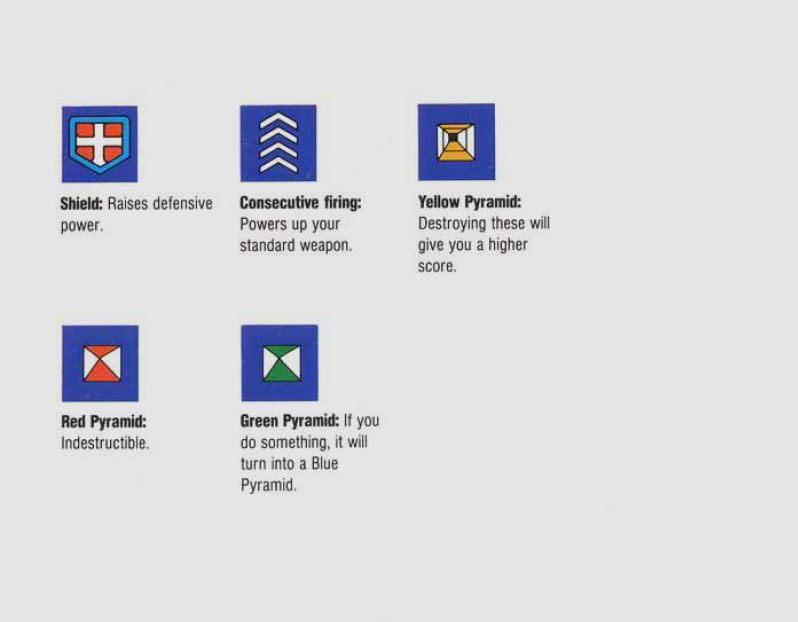
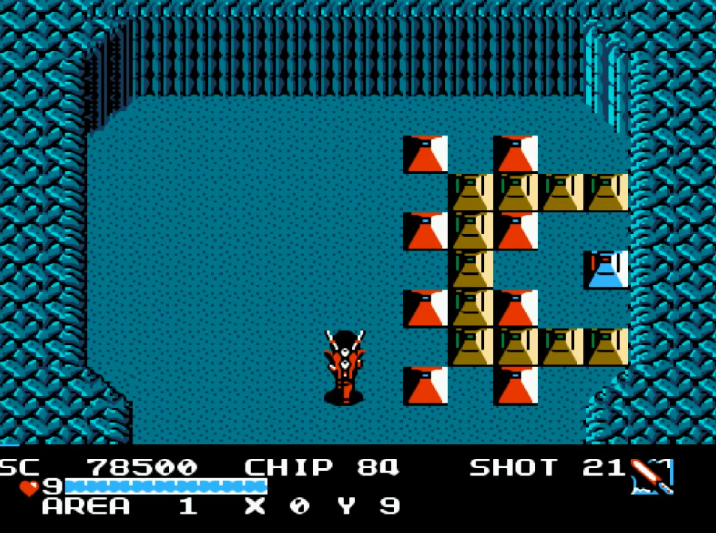
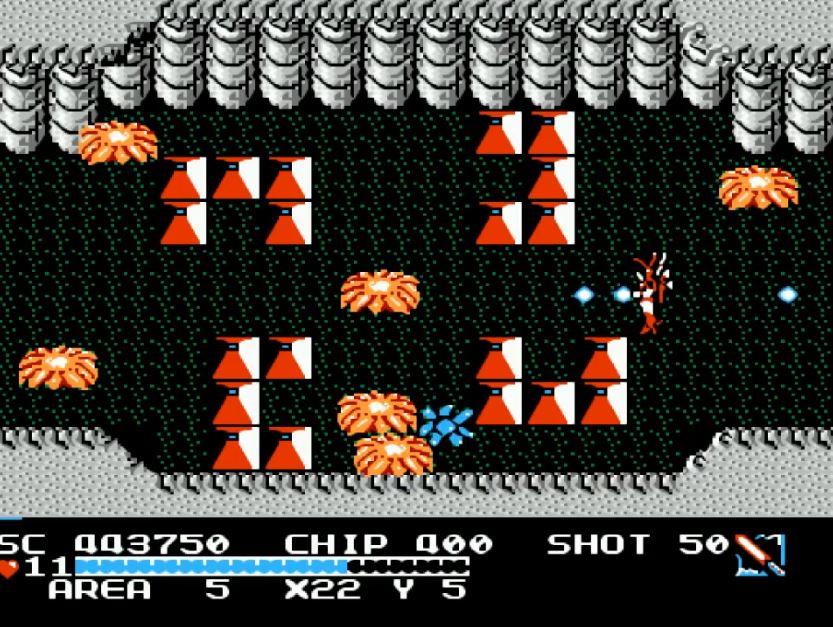
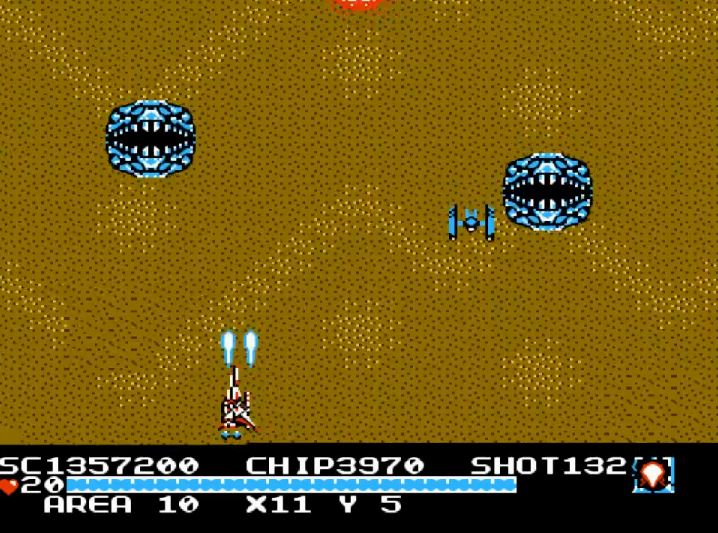
This first screen was daunting for me back in the day for more than a few reasons. There are four paths to choose from right off the bat, each one an independent gateway to this massive game. There are 10 unlockable over world maps as well as “Area 0” that acts as an intersect point for all of them. There are also 21 SHMUP corridor levels where you transform into your ship and blast baddies, 12 different weapons to discover and upgrade (up to three times each), as well as several leveling up mechanics for Alyssa such as weapon power, shield power and “chips.” Chips act not only as a currency for in game shops, but they double as an upgrade for your main weapon. You will also find permanent health upgrades which you receive as a bonus as your score increases or simply by running across them throughout the game. Another thing you may find, though less prevalent, are attack upgrades that make your main weapon more powerful. The world is littered with all kinds of interesting weapons and items and it’s a lot of fun discovering them all.
Mapping The World

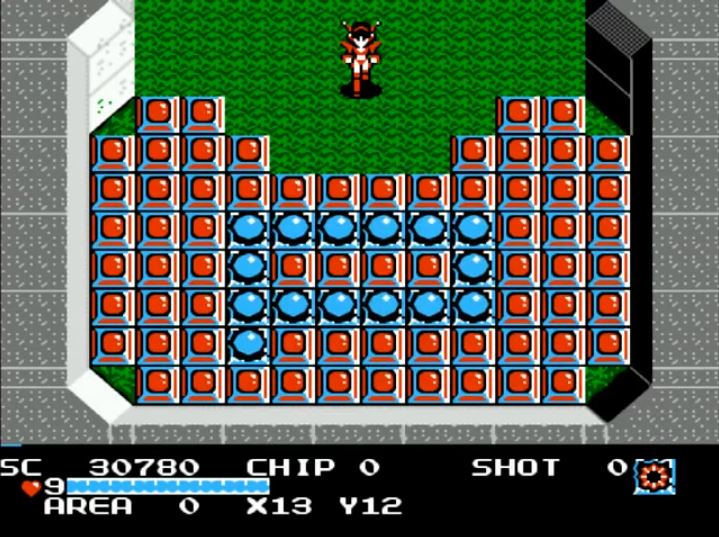
Above is a picture of the over world map. This map happens to be the “complete” map once all the areas have been unlocked (although you don’t actually see them on the map until you obtain the key for each individual section). I labeled each area and presented the complete map for reference so anyone unfamiliar with the game can get a sense of how large it is. Each small square on the map symbolizes a “room” to explore (think Zelda) and each branching path off of “Area 0” is a uniquely themed section (although there is some overlap in the themes). Each one of these unique sections has two shooter levels, one that is mandatory which gives you a key to unlock the next area (which you can see in the upper right corner of the above screen shot) and one that is a bonus of sorts. The mandatory corridors are labeled “1-10” while the bonus corridors are labeled “11-20.” If you complete the bonus levels you are usually rewarded with a weapon, weapon upgrade, bonus health or extra chips. So completing these, even though they aren’t mandatory is definitely in the player’s best interest.
Once you finally leave the relative safety of that first room and choose your path, you are greeted by a deceptively unoffending grassy plain. Whatever alien designed this area wanted Alyssa (or any intruder for that matter) to feel somewhat secure. Sort of like “Hey, take this sunny, grassy knoll and roll with it, nothing dangerous here.” And that idea works. There isn’t much here that is of much danger to Alyssa at this point in the game. Even the music is upbeat:
“Area 0 Music”
To play the media you will need to either update your browser to a recent version or update your Flash plugin.
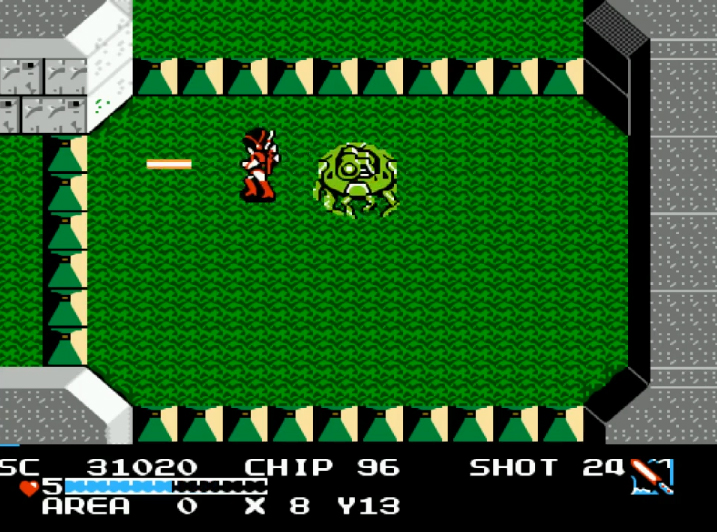
Explore long enough though, and you’ll end up coming across your first Mini-boss:
“Mini-Boss Fight”
To play the media you will need to either update your browser to a recent version or update your Flash plugin.
Doesn’t that music sound like a monster is dying to chase you around in circles on a perfectly cut lawn of Bermuda grass? And while we’re on the topic of monsters…. That tune really reminds me of something… Man this is really rubbing my brain funny…… WAIT! Here it is: VARAN
Ok, if you don’t get that reference you can find out what I mean near the beginning of my first article.
Getting back on track, you will encounter two Mini-Bosses per area. They range from laughably easy (like the guy above) to insanely fast and difficult. Don’t worry though, the really ruthless ones don’t come till much later in the game.
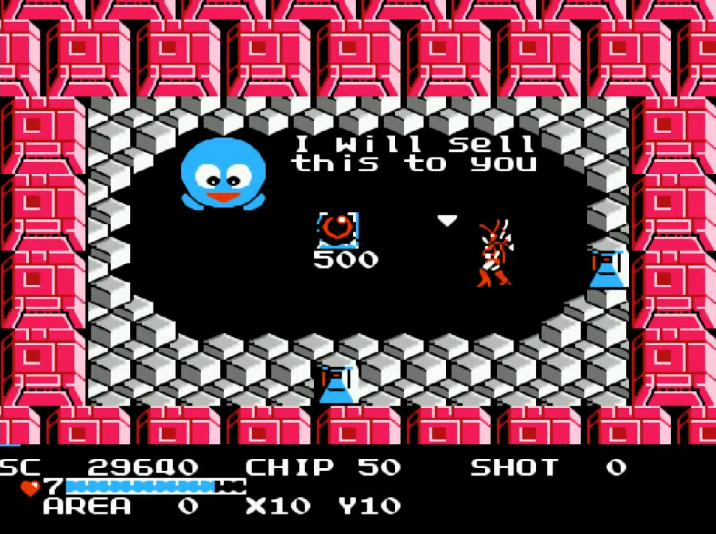
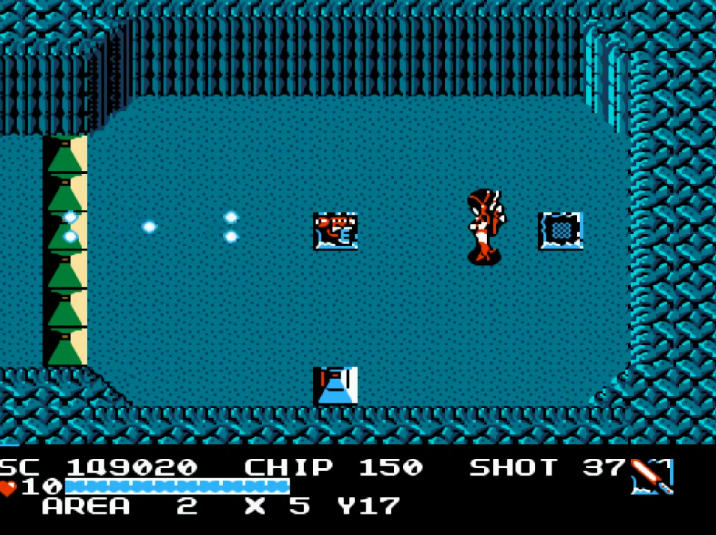
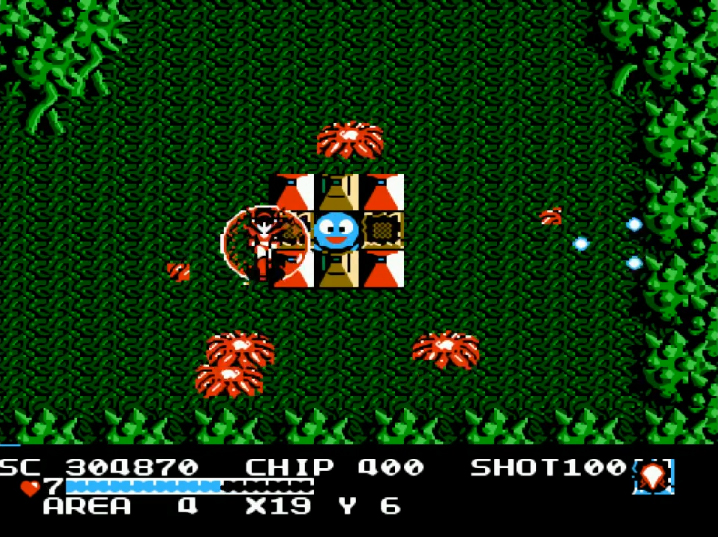
Another thing you will discover as you browse around the rooms of “The Guardian Legend” is that there are shops tended by “Friendly Blue Creatures.”
These shops generally carry upgrades you can purchase for your weapons and attributes. You will also find health for sale in the form of a “Blue Lander” which gives you a permanent health boost or a heart or energy tank which provides a temporary one. But why anyone would want to waste your valuable chips on a temporary health recharge is beyond me. Especially when there are rooms like this:
So when you are out and about, humming along on a sunny day on Naju, just look for a room with a “Friendly Blue Creature” and listen for the accompanying uppity super music and you’ll know you’re in the right place.
“Blue Lander”
To play the media you will need to either update your browser to a recent version or update your Flash plugin.
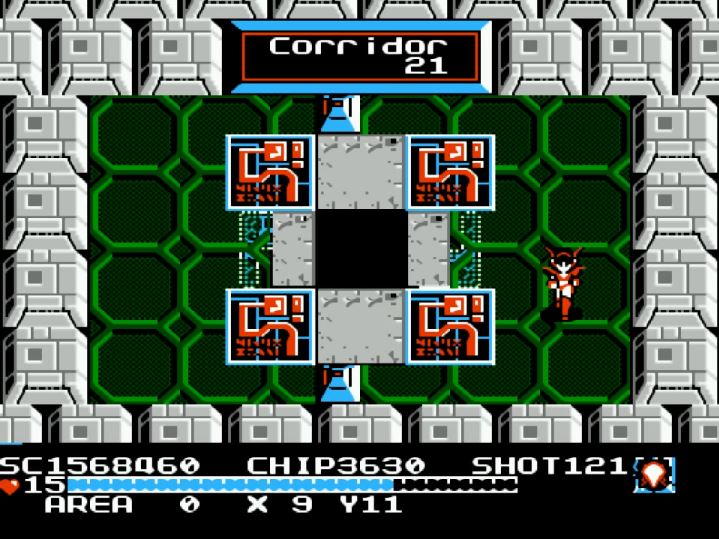
The First Corridor
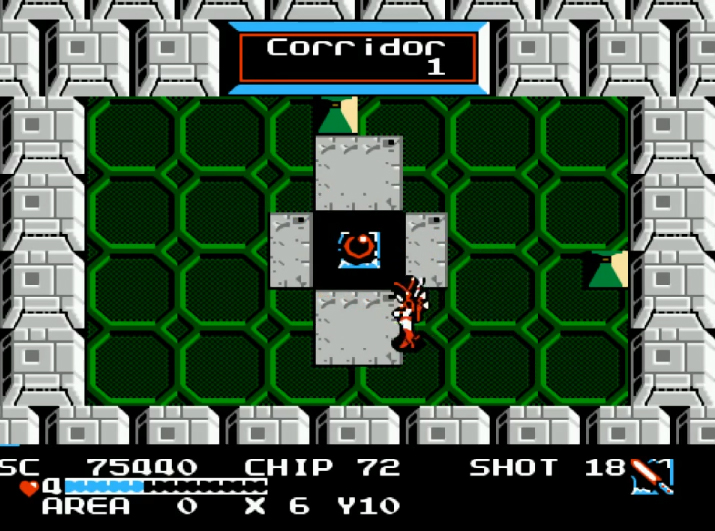
Now that all the gameplay mechanics are out of the way, let’s get to it! Corridor 1, here we come! Every time you unlock a new area, the game let’s you know where the next corridors are by pointing them out on your map. Back in a time when games loved to let you figure things out for yourself, “The Guardian Legend” took a page from modern games and held your hand (Marty McFly must have given them a heads up). Corridor 1 is easy enough to find on the left hand side of the map and when you do, it opens like the ancient, Egyptian looking relic that it is:
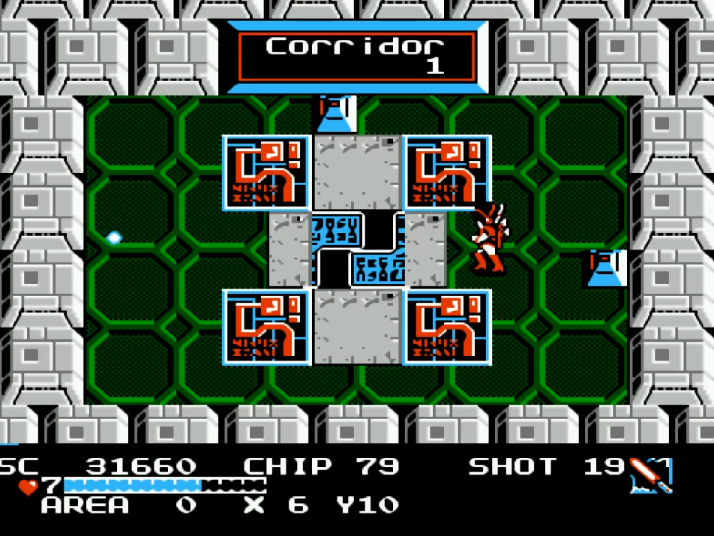
Enter the gate and Alyssa begins her transformation into the weapon of war that she was obviously designed to be. The Iron Giant has nothing on Alyssa!
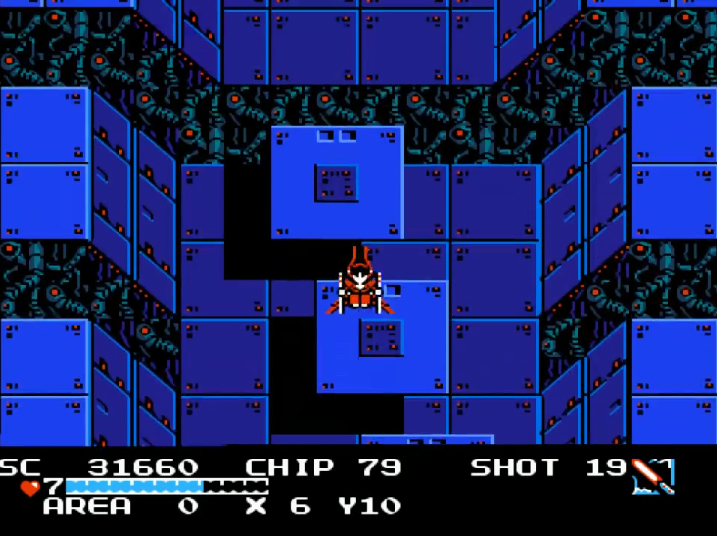
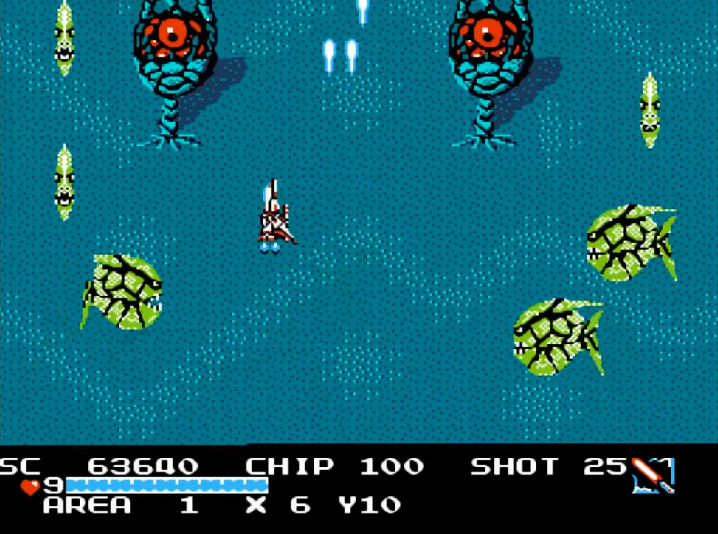
Once you have ascended into Corridor 1 you are met with…. Fish! And Invertebrates of all kinds! Not to mention a great little catchy tune that goes something like this:
“Corridor 1 Music”
To play the media you will need to either update your browser to a recent version or update your Flash plugin.
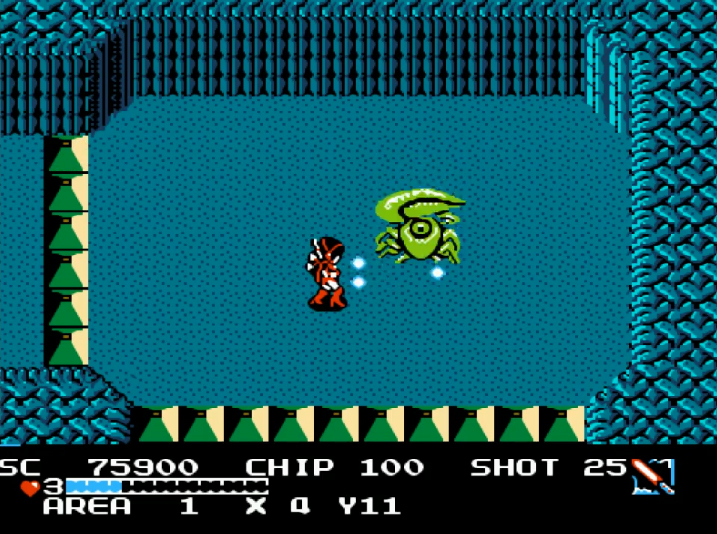
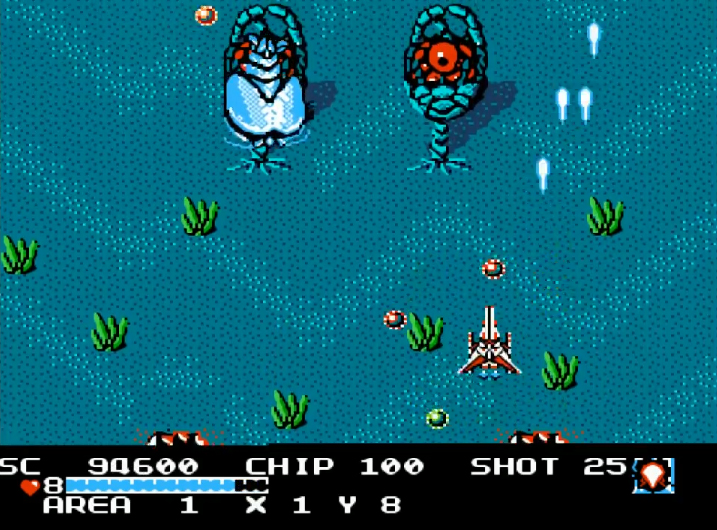
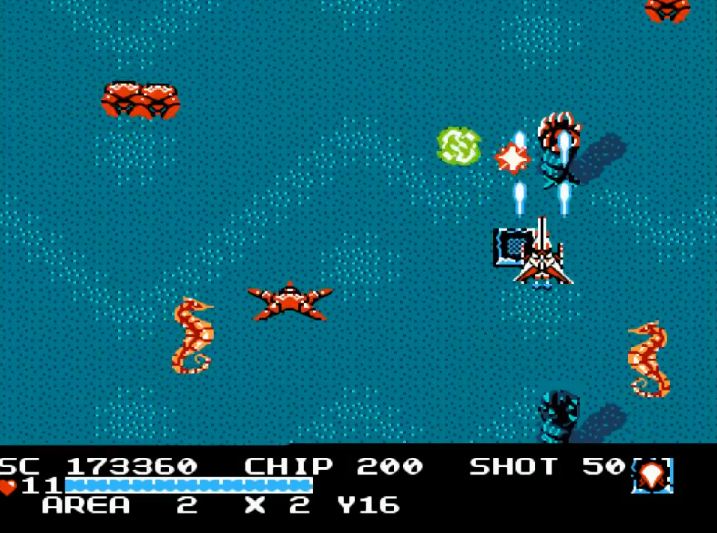
No wonder I loved this game as a kid! Anything aquatic related got my blood pumping. There isn’t much accuracy here as far as marine (and non marine) life goes, but it’s still fun to see it in the game. Not to mention, what good shooter doesn’t have at least one good aquatic zone? Here you’re hit with piranhas, rice shooting clams, suicidal manta rays and seemingly slow and harmless sea horses (just like in real life! So maybe a little accuracy). I figure the Naju aliens must have modeled this zone after the Amazon River delta, how else can you explain things like freshwater piranhas and saltwater seahorses in the same body of water? I know I’m being a stickler, but fish are how I make my living! What do you expect?
So as Alyssa floats her way through the crystal blue depths of Corridor 1, the enemies gradually dissipate and that familiar siren you heard as you entered Naju howls with an admonishing wail. It is time we met the one, the only, and the very fishy smelling: Fleepa. Who is accompanied by an equally fishy sounding Boss tune:
“Boss Fight 1”
To play the media you will need to either update your browser to a recent version or update your Flash plugin.
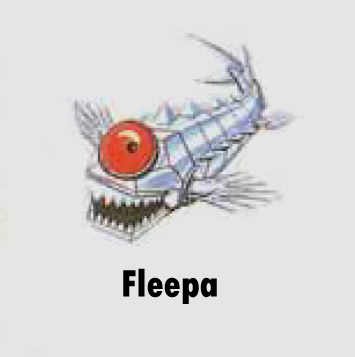
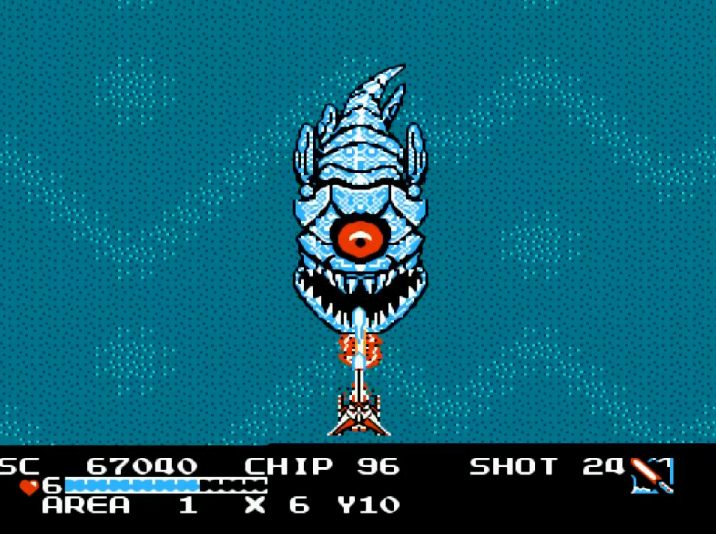
Yes it’s Fleepa, a giant, boney fish of some sort. Or perhaps more like an evil, mutation Cyclops fish actually. But we all love Fleepa because he’s so cute and predictable. Up and down he goes until Alyssa’s saber of light slices and dices him into sushi. No contest here. And unless you are appallingly bad at shooters, you should have no problem disposing of his fishy smelling bones. But something tells me we haven’t seen the last of Fleepa.
Congratulations! Corridor 1 is complete! And like I mentioned earlier, the mandatory corridors numbered 1-10 give you a key:

And also a bonus item!
In this case, the Repeller weapon which is quite useful actually. And thanks to our moon key we can now enter “Area 1!”
A New Area to Explore
“Area 1” is blue and aquatic looking just like its accompanying corridor. With Mini-bosses that fit the mood perfectly, accompanied by a subdued tune to fit the mood as well:
“Aqua Sector”
To play the media you will need to either update your browser to a recent version or update your Flash plugin.

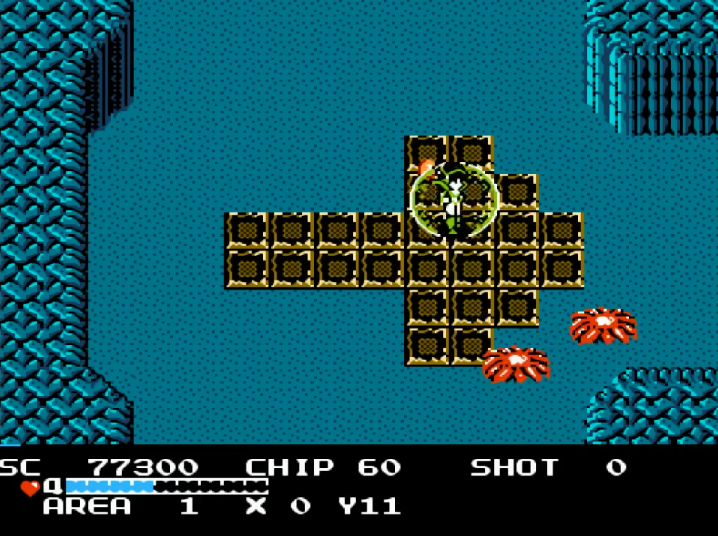
A giant crab and equally menacing blue jellyfish/UFO looking monstrosity. Both made specifically to chase Alyssa in circles until she either explodes in a blaze of glory or blasts them into fish sticks. Let’s hope for our sake it’s the latter because they aren’t too difficult. Use your newly obtained Repeller and collect your spoils of war.
There are around 30 rooms to explore in Area 1 and you’d be wise to check them all, especially if you plan on saving your game. There is a “Friendly Blue Creature” in every area who will enthusiastically and happily record your progress with what is most likely the worst password system ever devised by man:
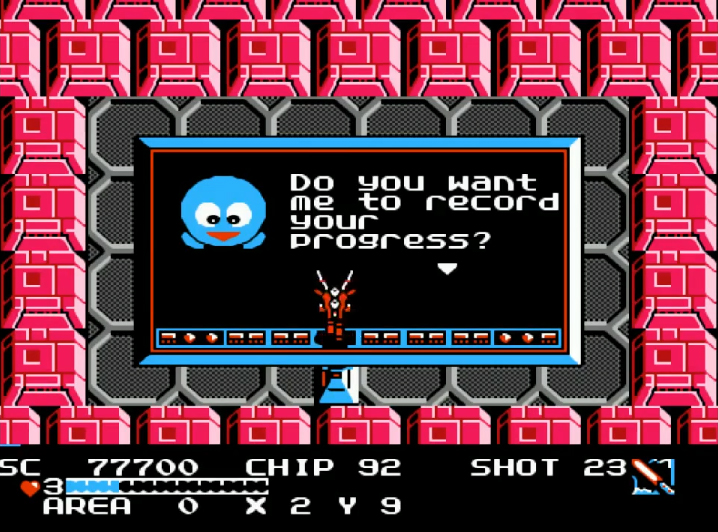
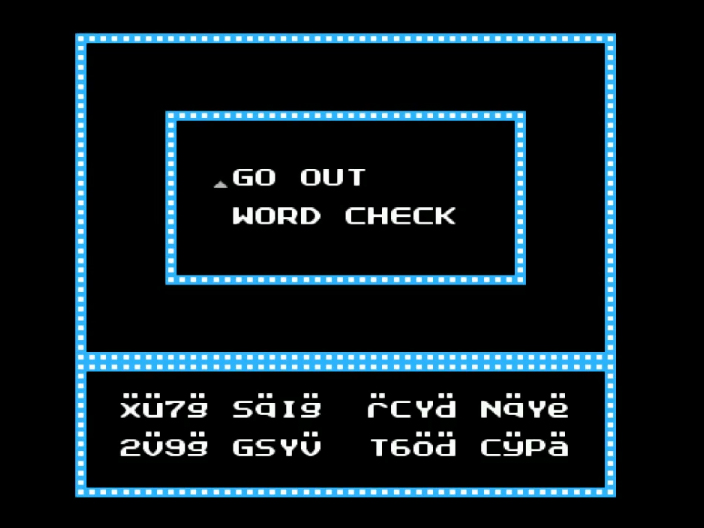
Guys, would it have been so hard to just include a battery backup in the cartridge? Really? You’re going to make me try and decipher those symbols in my own handwriting days or even weeks after the fact? Ugh, I can remember losing progress in this game as a kid because not only was their 32 character password system extremely hard to read, but also because I got an F in handwriting in elementary school! And look! Now we don’t even need hand writing! Who the hell writes with a pen anymore? Quit with the Klingon looking pass codes and just give me a damn battery backup before I gouge my own eyes out!
Corridor 11: Too Much Nori
So once you’ve wrestled with the password system and thoroughly explored “Area 1”, it’s time to hit Corridor 11. Once you’ve entered, you will find that it is eerily similar to the last corridor you were in. In fact, not much has changed other than the fact that we moved from the rocky reef to the sea grass flat. The enemies we encounter are mostly the same except some angry red starfish and a thing that I can only describe as a floating blue cow’s heart. Well, that’s what it looks like to me.
Sift your way through the grass and we end up with another large green hazard who emerges from the murk. Boss number two that is. His name is Optomon and he is a giant, one eyed brain who vomits sea weed your way (why all the one eyed bosses?). Accompanying him is also my favorite boss music in the game. A tribal sounding hymn with a pounding base line to match the tone. It makes for a suspenseful tune:
“Boss Fight 2”
To play the media you will need to either update your browser to a recent version or update your Flash plugin.
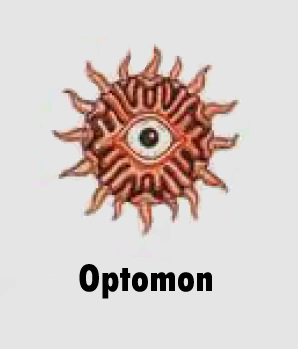

Speaking of suspenseful, victory against Optomon is by no means certain! He’s the first real challenge you will face in this game. His twizzler-looking sea weed strips do major damage so avoiding them is a prerequisite for his destruction, if you can manage it that is. They stretch out across the screen and make moving sort of like trying to fly underwater in a space ship. Luckily, Alyssa has a fire based weapon that has no problems working underwater. This “Fireball” works fairly well and if you can time it right and line it up with his ever present need to meander from side to side, you should be able to burn his cellulose down to cinders before you know it.
Area 2 and More Underwater Madness
Upon torching Optomon we have officially cleared “Area 1.” Grab your gear and head south from the main map to “Area 2”, which honestly is more of the same. The enemies are a little harder and the power ups a little trickier to get but all in all it’s not mind blowingly difficult. Although you do get your first weapon power up which helps immensely:
Explore enough of ”Area 2” and you will come across Corridor 2 and what time is better than the present to take it on?
Corridor 2 and a Case of the Crabs
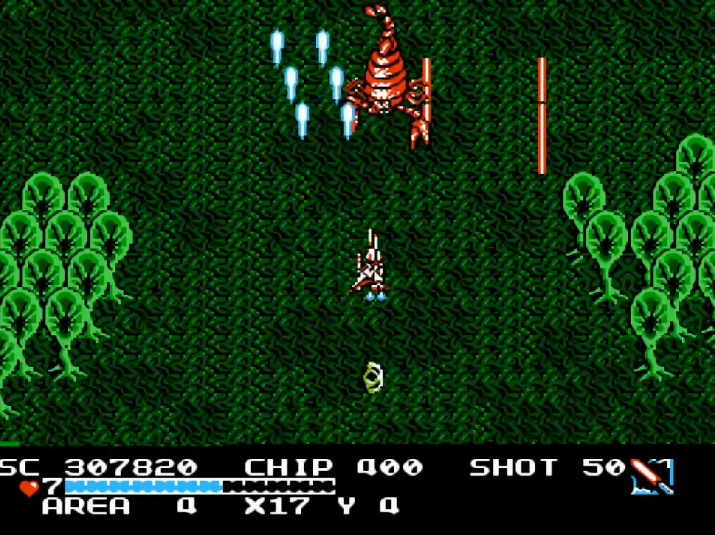
Corridor 2 is a familiar jaunt through an underwater slaughterhouse. The enemies which look mostly the same on the outside, are much faster and more effective than before. There are also an inordinate amount of sea shells everywhere as if there is some sort of subliminal underlying theme. Perhaps it has something to do with the impending boss who has a similar calcium based carapace to protect him from Alyssa’s blistering energy blasts.
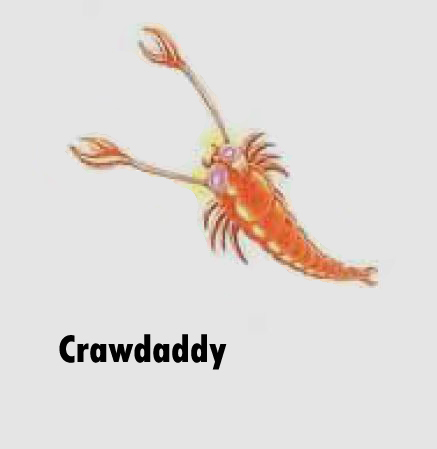
While Crawdaddy appears to be a giant crawfish and has some dangerous looking claws, he doesn’t really know how to use them very well. All Alyssa need do is whip out that water resistant fire ball and sit front and center while Crawdaddy boils like the delicious buttery lobster he is.

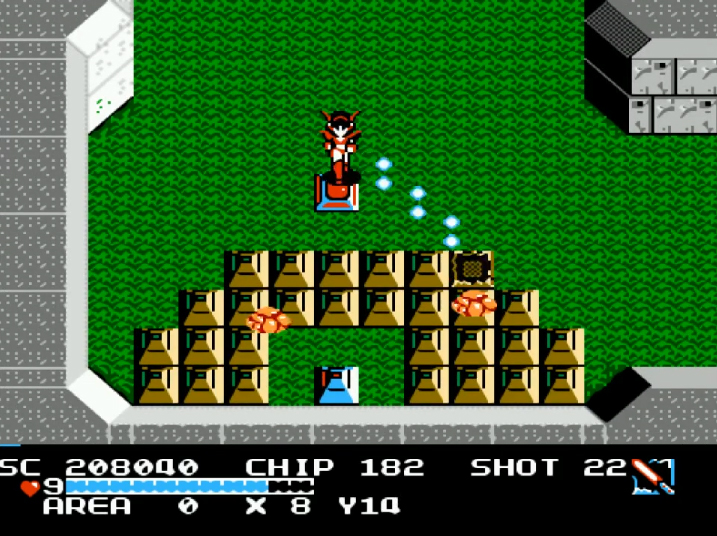
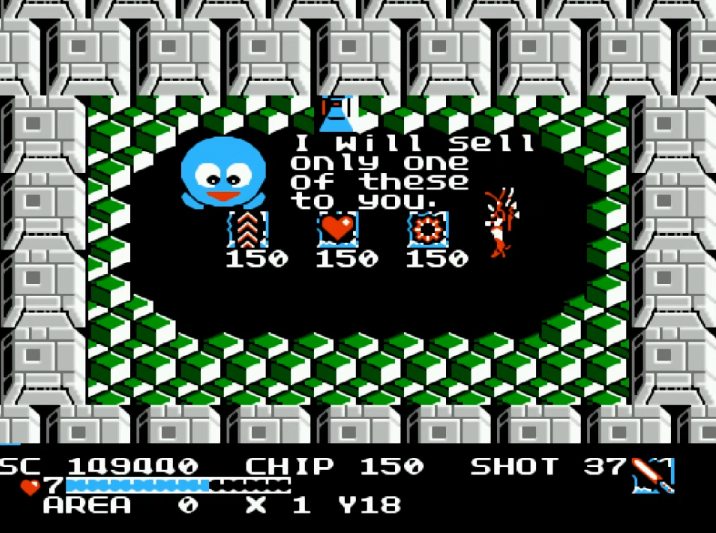
Once Crawdaddy is deliciously dead, we can head over to Corridor 12. Just make sure you don’t miss this shop along the way, the weapons will serve you well:
Did I also mention that each “major” corridor (meaning Corridors 1-10) have a puzzle to solve before you can open them? Your alien friend has left clues in computer terminals throughout the land that you must find in order to unlock them. The puzzles range from shooting a certain weapon at the corridor, to pestering a “Friendly Blue Creature”, to simply walking over the right area. It isn’t much, but it is a nice little puzzle solving touch.
Corridor 12: The Fish Returns
Moving on, Corridor 12 is in our sights. Our final trek through this inexplicable underwater endeavor (seriously, seems like a lot of work to flood these corridors doesn’t it?). And Corridor 12 is more of what we saw from Corridor 2 with a few exceptions. This time around, Alyssa has kicked on the afterburners. This level is FAST! Like she’s ready to get on with it. And after a couple of annoying Cyclops moles, I’d say I’m ready to get on with it as well, on to the next boss that is.
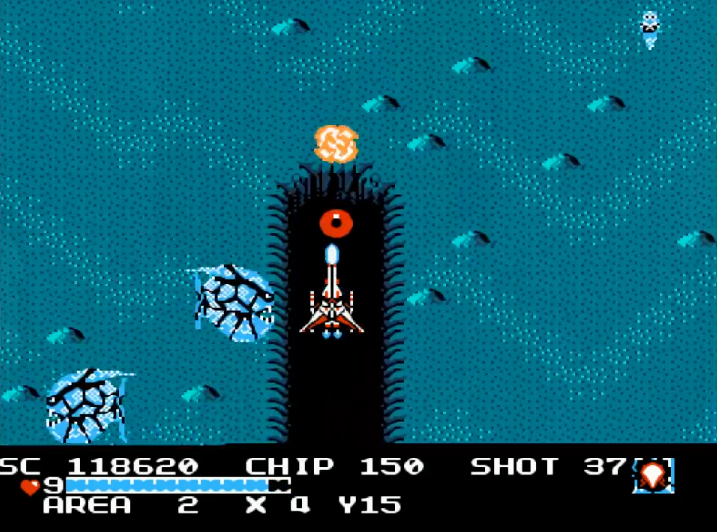
And who is the next boss you ask? Back from the abyss of the Marianas Trench its Fleepa the Red!

Fleepa the Red isn’t much different than Fleepa the Blue. Other than the fact that he bounces faster and fires an insane amount of his jellyfish minions your way. Use the “Area Blaster” to best effect here. It’s a nice weapon that zigzags its way across the screen slurping up the jellies as it goes. Hold strong for a minute or two and Fleepa the Red will be fish food once again.
Area 3: Attack of the Mutant Plants
Once you’ve dispatched poor Fleepa for the second time, “Area 3” is unlocked and it’s up the river to the Amazon we go! “Area 3” is a decidedly thorny patch of enraged flora. This “Little Shop of Horrors” inspired zone brings Alyssa face to leaf with some wicked greenery. Take this angry toothed Mini-Boss Flower for example:
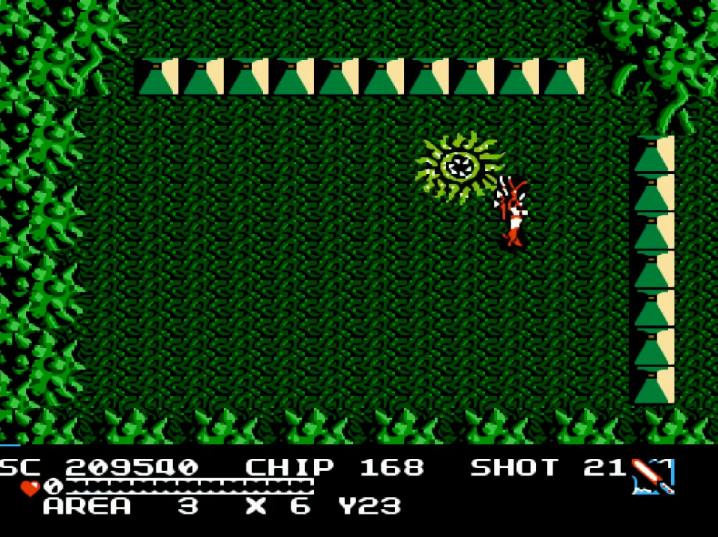
This hopping shrub also offers you the first real challenge of any Mini-Boss encounter thus far. Just make sure to give it a good kick in the chloroplasts for good measure. This area also has some of my favorite over world music. Kind of a nurturing melody that encouraged me to explore every nook and cranny:
“Area 3 Music”
To play the media you will need to either update your browser to a recent version or update your Flash plugin.
Corridor 3 and the Influx of Fungus
At this point you should know the drill, explore and collect until you reach the next corridor, which in this case is Corridor 3. A trek through a spore infested fungal nightmare of furious mushrooms, venom spitting flowers, Pterodactylus (huh?), and out of place, miniature space ships that seemed to show up for the wrong corridor’s casting call. Did I also mention the slightly annoying music? Its high pitched whine tends to get stuck in your ears like the incessant ringing of a bad ear infection. Listen if you dare:
“Forest Sector Corridor”
To play the media you will need to either update your browser to a recent version or update your Flash plugin.
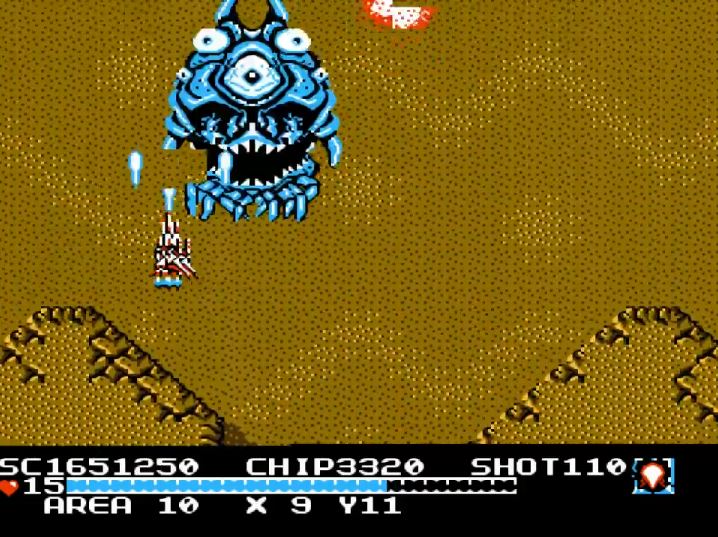
Fight your way through this horrifying, edible arrangement and you will find yourself at what I consider the most frustrating and difficult boss encounter of the game:
That’s right. Optomon is back, this time in a very un-plant like shade of blue. But he’s a lot meaner this generation and his seaweed/twizzler poles are longer and more prevalent. Not to mention they will kill you almost immediately the second you touch them. This leads me to the conclusion that hands down, this incarnation of Optomon is the hardest enemy in the entire game. And the worst part is, this isn’t even the optional corridor. It’s beat him or bust! On my most recent play through it took me 10 tries, yes, 10, before I was able to take him down. There is no easy way, and if you want to add insult to injury his pattern is totally random! There is no rhyme or reason as to where he spews his seaweed puke. Out lasting him in a pure fight of endurance is your only salvation.
Endure this fight long enough and Alyssa will prevail. Grab your loot and head back into “Area 3” with hopefully a new outlook on life. There are also many nooks and crannies left here to explore so before you hit Corridor 13, make sure you find them all. You’ll need them.
Corridor 13 and the Bombarding Airship
Once the all clear has been waved, head over to Corridor 13 for another fight through an Amazon of bitter weeds, thorny briars, asteroids (??) and red spinning spore sacks of death. By now, Alyssa should be a bit more powerful thanks to the numerous items we have found scouring each area. Unfortunately, the enemies are also a bit more juiced up as well. Just make sure to use your fireball and keep scorching this rainforest like it was the real thing and you’ll end up at your next destination:

The Bombarder! This guy is a pushover despite the fact that he apparently has a phase shifting cloaking device. You know, kind of like the one they found on The Pegasus starship during Star Trek the Next Generation episode 164. He shifts around the screen disappearing and reappearing, shooting annoying but mostly harmless missiles at you. Defeating him is an exercise in patience. Just wait him out, hit him when he’s about and you’ll be off to “Area 4” before you know it.
Area 4 and the Real Rainforest
Reaching “Area 4” requires traversing back through “Area 0” and up to the top right corner of the map. What you encounter is more Amazon with mostly similar enemies. Although there do appear to be more actual animals this time around:
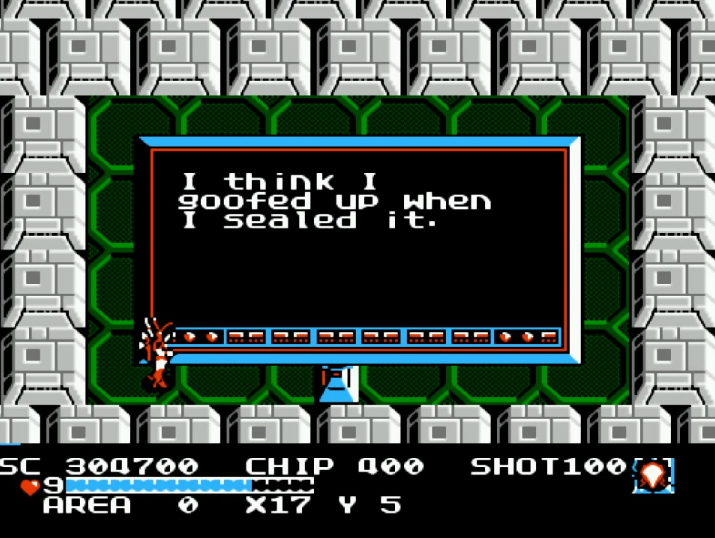
There is also a rather comical clue along the way, I guess even perfect aliens make mistakes right?
But other than the usual tropes of items and shops containing wonderful trinkets for Alyssa’s ever growing collection, there isn’t too much new to report. Onward we go to Corridor 4!
Corridor 4 and the Desolation of Teramute
Rather than run you through extremely familiar territory I figured we’d jump right into Corridor 4 and its somewhat familiar foes. This time around we have actual flowers on the attack along with the usual Pterodactylus and angry spores. It isn’t incredibly difficult so use your scorched earth strategy from before and you’ll end up at:
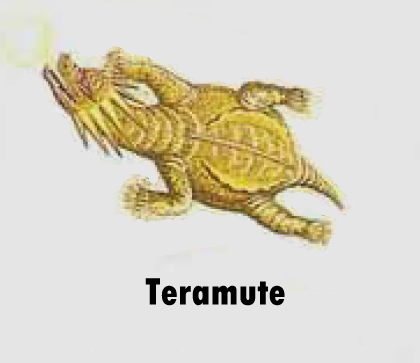
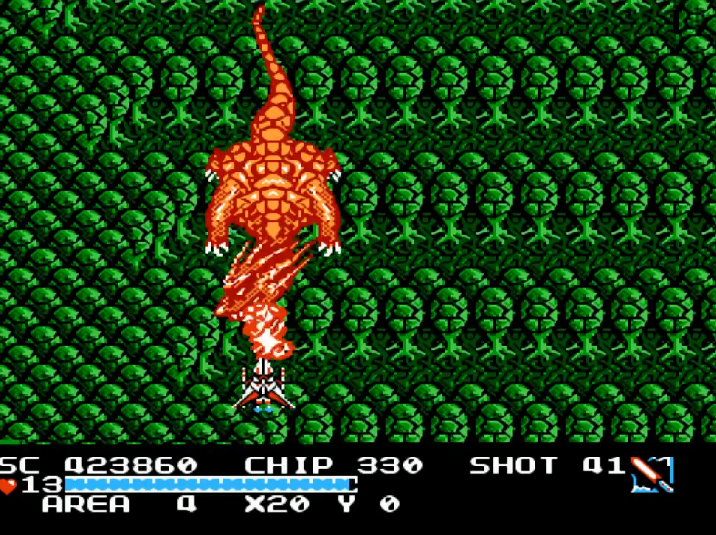
Teramute! Or in other words, a giant dragon/dinosaur forever lost in the desolation of the Amazon jungle, recreated here on Naju by our ingenious super race of alien Stephen Hawkings. And I will have to say, for being a frighteningly huge monster he doesn’t provide much of a challenge. As a matter of fact, he takes the cake for being the most effortless boss in the entire game. So easy in fact that I am pretty sure most gamers could beat him with their eyes closed and using the controller with their feet. The only advantage Teramute has is that he apparently grew a biological version of the phase shifting cloaking device that his fallen brethren possessed. Doesn’t matter, sit in one spot, fire away with whatever weapon you happen to like and he will soon explode to the netherworld where dragons go to sulk.
Corridor 14 and The Claws of Wrath
Why ruin the momentum when things are going so well? Head through the forest and off to Corridor 14 we go! This corridor is a little different, however. Among the highlights include laser shooting crabs and some tumorous looking organic growths with sharp teeth and a tendency to toss pork legs at you with no regard for your safety.
Power through the legions of impassioned vegetation and once again, like Corridor 13, we are faced with an inorganic boss fight:
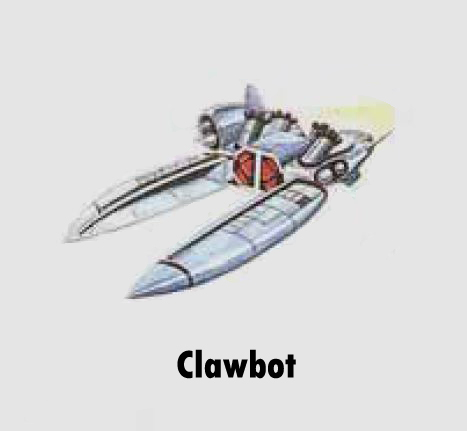
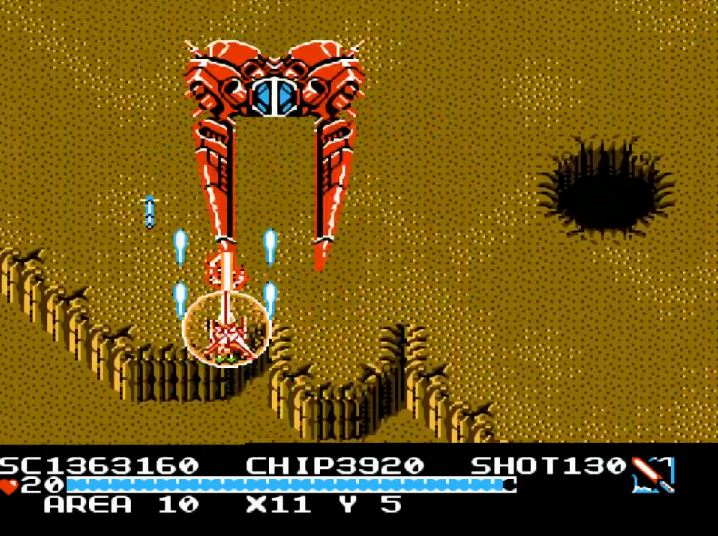
Clawbot is exactly what his name suggests: a bot with claws. Or perhaps more accurately, a giant ship with giant claws and a giant searing laser that fires on you like the Death Star after opening his torso. A never ending barrage of missiles also fly about from all angles as you attempt to dodge five things at once. Keep hitting those claws though and they turn orange and fall off:
Now his epic laser is firing like its Return of the Jedi and you can do nothing but pound him with everything you’ve got until he explodes and joins The Bombarder on the forest floor scrap heap. The Jawas would have no problem finding spare parts here. If only this was Tatooine….
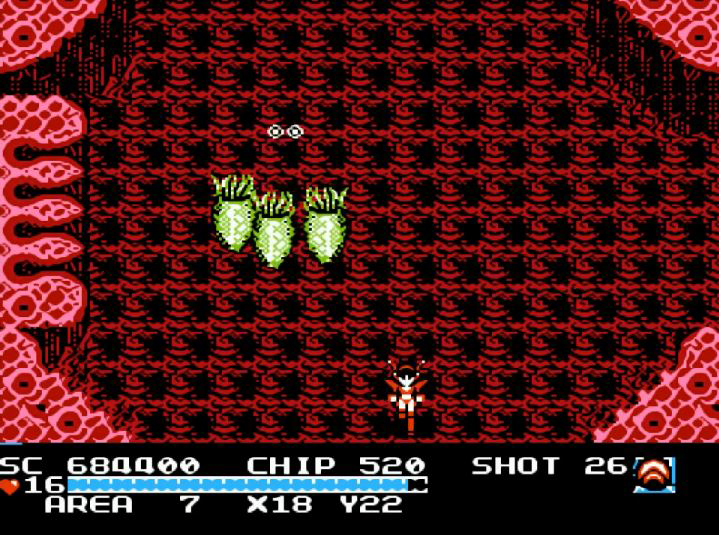
Area 5: Fighting the Precious Stones
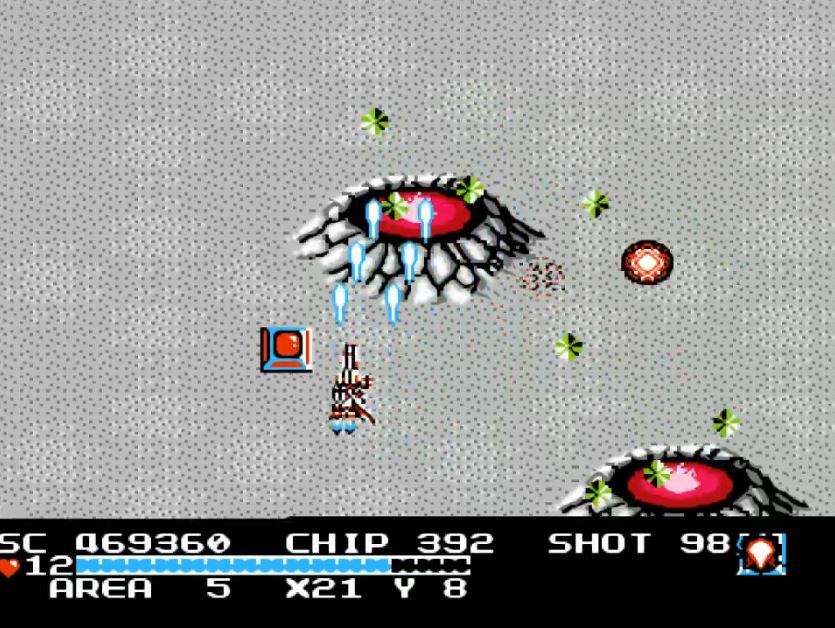
Once you’ve completely burned down the sacred forest, it’s time to head south to the diamond mines of “Area 5.” This is also where I noticed a significant notch up in difficulty. The enemies here are numerous and deadly. There is even a new Crystalline Entity Mini-Boss to fight:
By now you should also have some upgraded weapons such as the bullet shield that launches a giant ball of plasma that helps protect Alyssa from harm:
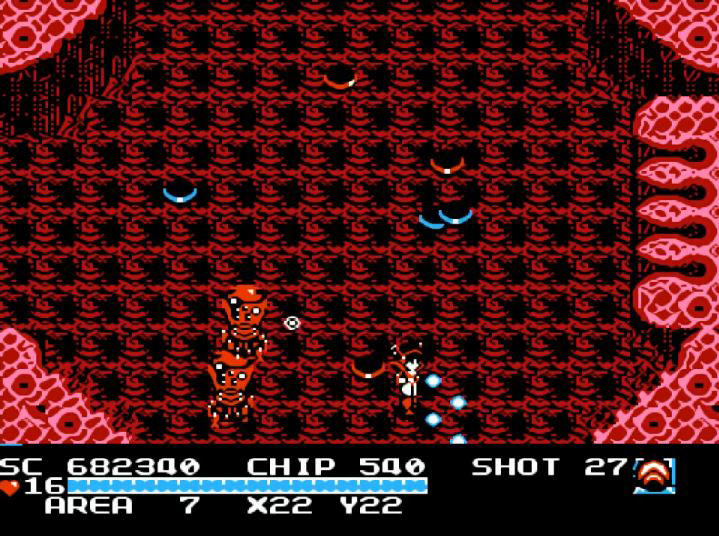
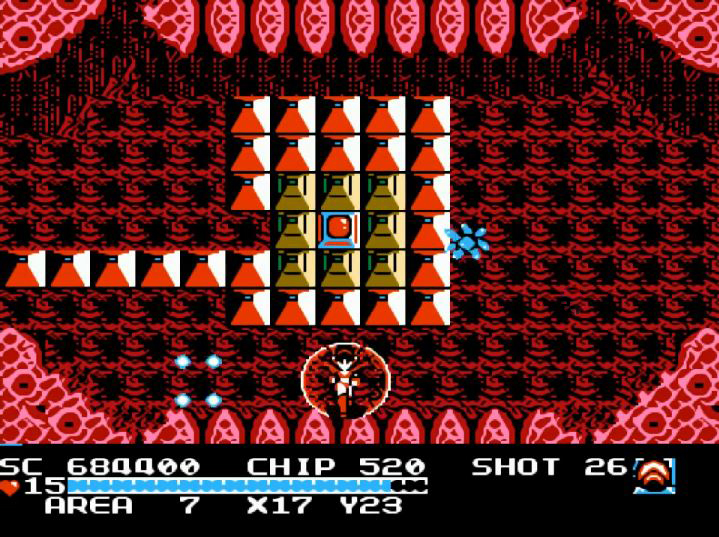
You will also encounter rooms with ever increasing numbers of enemies and obstacles. Watch out or you’ll end up in the center of a firestorm, generated by the angry denizens of the mine:
Corridor 5 and the Out of Place Boss
Like the overworld that preceded it, Corridor 5 is all about rocks and crystals. Those wonderful shimmering, worthless bits of matter that our girlfriends and wives love to make us spend months of our salaries on. Oh please Alyssa, blast them all to oblivion! Thankfully, there is also a new, jewel like tune to accompany your luminous journey through the crystalline caverns:
“Crystal Sector Corridor”
To play the media you will need to either update your browser to a recent version or update your Flash plugin.
Once you are done blasting worthless rocks, the latest boss is in your sight. And what an out of place WTF moment you will have with this one:

Ok, so Zibzub appears to be a squid of sorts. The problem is, he is completely out of his element (no pun intended). Why on Earth (or UNDER Earth??) would there be a giant squid in a crystal mine? Especially considering we traversed through a beautiful quartz ocean earlier that he would have no doubt been more than happy to call home. Pointless lamenting aside, Zibzub is another complete pushover. He hops from one side of the screen to the other firing squid missiles (which, by the way, look a lot like normal missiles) at you with little regard for his own safety. Pull out Alyssa’s saber and hit him hard on his slimy, shimmering tentacles and he won’t last 10 seconds. Hopefully Zibzub is now peacefully swimming with the fishes.
Corridor 15: Rise of the Crystalline Machines
So once Zibzub is sufficiently calamari, it’s time to hit Corridor 15. This corridor has a decidedly different tone than number 5. The theme is still crystals but the machines as well as the forces of nature are out in tandem. Everything from irradiated clumps of citrine to emerald spewing volcanoes of tourmaline to laser blasting midget aircraft. It makes no sense but you gotta love it anyway.
Keep loving it all the way to the end and an old friend rears his ugly claws:
That’s right, Clawbot makes his distinctively green return. Luckily he isn’t much different than the first time around other than his increased health and fashionable new color choice. Hit him hard with your saber and his hardware will melt down to the alloy it was based on. Diamonds, apparently, are not forever .
Area 6: More Crystals, More Machines
Once Clawbot is wrecked for the second time its south again to “Area 6”, aka part two of the crystal mines. The only real difference is a shift in the music. Unfortunately it’s one of the lazier and less inspiring tracks in the game but it does have an incessant, authoritative sound to it:
“Crystal Sector”
To play the media you will need to either update your browser to a recent version or update your Flash plugin.
On the way to Corridor 6 you will fight your way through asexual, metro style reproducing crystal slabs:
A Mini-Boss that equates to a mouth slurping up from a puddle:
And of course don’t forget the usual exploration and cleaning up the treasures that hide at every corner:
Corridor 6 and the Underwhelming Boss
After collecting the goodies, we are headed to Corridor 6 where we find a very slow moving stage that simply bombards you with a never ending spawn of volcanoes. The aliens must have modeled this crystal mine after Jupiter’s moon of IO. Volcanoes never had it so good.
Fight fire with fire and blast them all with your giant fireball and we arrive at what has to be the most misplaced and half-assed boss of them all:
What a sad, sad boss. Yes, he was so insignificant that he wasn’t even graced with a name or an appearance in the instruction manual! So I don’t have a nice hand drawn picture to share with you. And to top that off he’s a total push over. All he can manage to do is flit about from one side of the screen to the other firing missiles at you. Pull out your saber, count to ten and he’s scrap metal.
Corridor 16: The Return to Hell
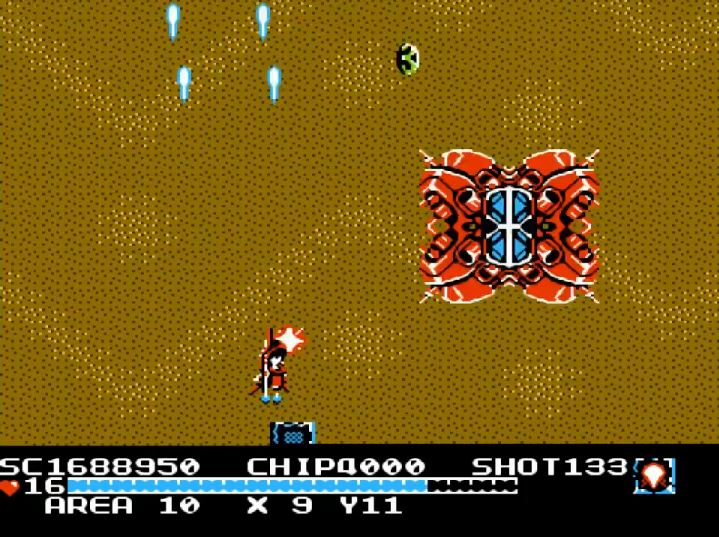
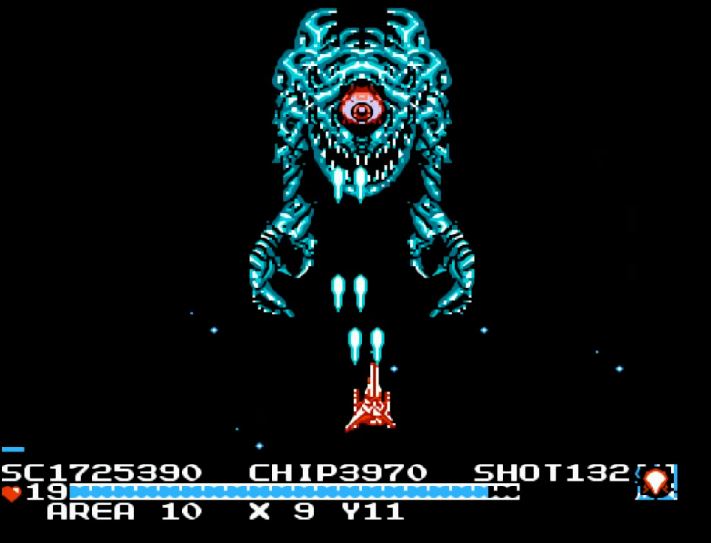
So the nameless, diminutive bot-ship is dispatched, what could possibly be next? Corridor 16 and the return of a nightmare boss! But first, the corridor itself. Which is honestly pretty much a rerun of what we’ve seen from the last three crystal themed corridors. Re-skins of a host of enemies from previous environments with of course, crystals thrown in for good measure. Power through it to the end though and you’re in for one hell of an eye opening experience. The returning magnum opus eye of Optomon, The Red:
Way back in Corridor 3 we fought what I consider the most challenging boss in the game. This time around thanks to Alyssa’s new upgrades, the mutant eye-brain from hell isn’t quite as difficult. “Quite” being the key word. He’s still a horror of epic magnitude though. Tossing even longer twizzlers at you (they are now actually red, woot!) and spores galore. Fortunately, Alyssa now has access to the level 2 fireball which will help take down those annoying twizzlers and make this monstrosity from Hades a bit easier to defeat.
Area 7: The Body is a Juicy Place
Now that Optomon the Red is reduced to gooey mush, it is time to progress to “Area 7.” Upon entering this new playground you will notice something right away, it looks like Alyssa is now traveling through the innards of some giant horrible beast. The environment is pink, gooey and filled with things like, prickly pineapples, spinning hamburgers and of course angry red blood cells with the face of a Borg:
So we must literally be in the belly of the beast. Ouch! Try and forget that fact and keep searching out all the hidden Easter eggs. They will make life easier in the meaty corridors to come.
Corridor 7 and the Bloodshot Eyes
Upon reaching Corridor 7, I was suddenly hit with the notion that this game had suddenly become “Life Force”, circa level 4. Although this beast has a serious fungal and parasitic infection running through its veins. Everything from mushrooms to ticks to laser shooting midget ships (again). And those lasers are deadly and overwhelming at all the wrong times. This is the point in “The Guardian Legend” where the difficulty really begins to ramp up if you aren’t prepared. There is also a nice recurring eye ball theme that you will notice throughout these icky, bloody levels of blush colored slime accompanied by a new tune to boot:
“Organic Sector Corridor”
To play the media you will need to either update your browser to a recent version or update your Flash plugin.
Stick it to the insanity of innards and you will come across another nameless boss. Let’s just call him “Eyeball Patch.” Eyeball Patch tosses multitudes of minuscule optics at you but by now Alyssa’s giant fireball of destruction will make short work of him and his enhanced, ocular implants. Hit him hard and he’ll look like a pothead raiding a refrigerator at 2 AM. Bloodshot indeed.
Corridor 17 and the Infected Intestines
With Corridor 7 in the proverbial hazardous waste bag, it’s time to head over to the optional but oh so appropriate Corridor 17. Now the nice thing about this corridor is that it isn’t simply a repeat of Corridor 7. There are some genuinely different baddies to be found. But if you thought the last beast had a parasite problem wait until you see this:
The giant blue “cow hearts” make their triumphant return as well as some charming green ticks and comely tape worms…. Yeah…. Am I really killing tape worms in some behemoth’s intestinal tract? Yes I’m afraid I am. Luckily, this level isn’t too incredibly challenging and once you reach the end you find a near carbon copy of the “Eyeball Patch 1.” Only this time he’s wedged up in this beast’s upper intestines. Who would have thought eye balls tasted so good? Same tactics as before and he’ll be blind in less than a minute.
Area 8: More Bloody Hell
That’s right, finish up the eye balls in “Area 7” and its west to “Area 8” and more escapades through the bowels of the beast. “Area 8” offers more blood, more guts, more goo and even a nasty re-skin of an already tough Mini-Boss:
Do your thing, explore the terrain, follow the arrows (although I’m still not sure they actually lead anywhere) and you’ll eventually reach the next corridor, a little richer than before.

Corridor 8: Eyeballs Aplenty
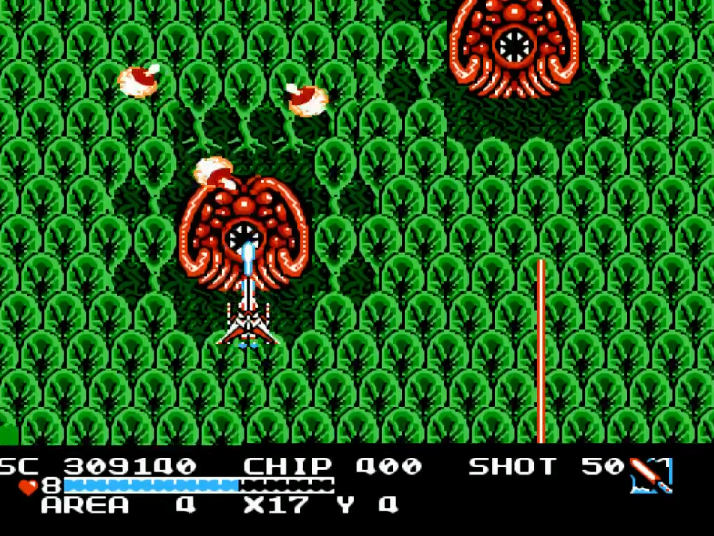
Yes, more eye balls. But mercifully, we are out of the intestines and back into the blood stream. A blood stream loaded with asteroids, parasites and even some manta rays that somehow swam far enough upstream to become a scrumptious meal for this whale of a beast. Oh yes, and did I mention there are more eye balls than ever before? Complete with blue, oxygen starved veins pulsing through them:

Just keep firing, collapse a few veins, cut off the blood supply and you’ll find yourself in the presence of an epic and quite difficult boss:
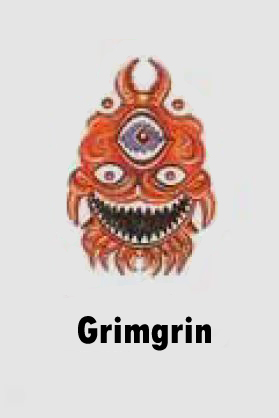
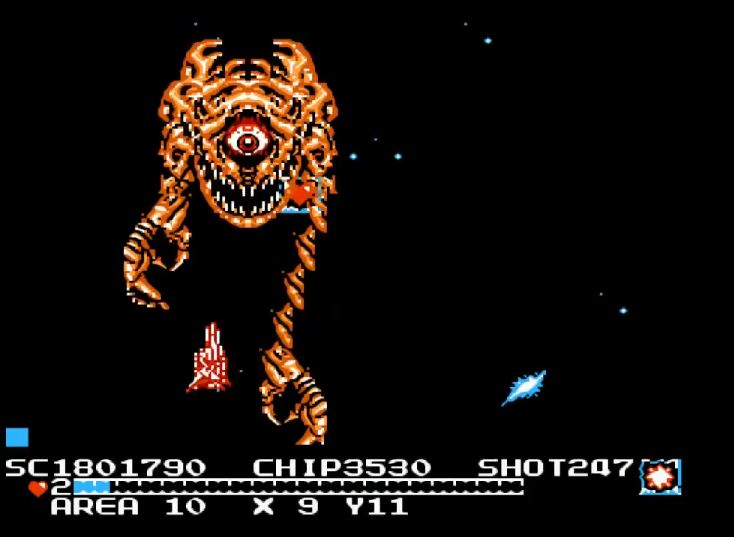
Yes, it’s Grimgrin! Another fan favorite and a legend of difficulty. You might also notice that he has a grand total of seven eyes! All the more to see you with Alyssa, muhahaha! Grimgrin is an epic irritation that just never seems to die. Just keep on blasting and pray for power ups and you may get lucky.
Corridor 18 and the Return of the Beast
So with Grimgrin dispatched and Corridor 8 pounded into mush, it’s time for our optional quest through Corridor 18. No big deal here as it is essentially identical to Corridor 8, enemies and all (although perhaps less eye balls).
Fight your way through this last corridor of biological sludge and you will reach a recently familiar friend:
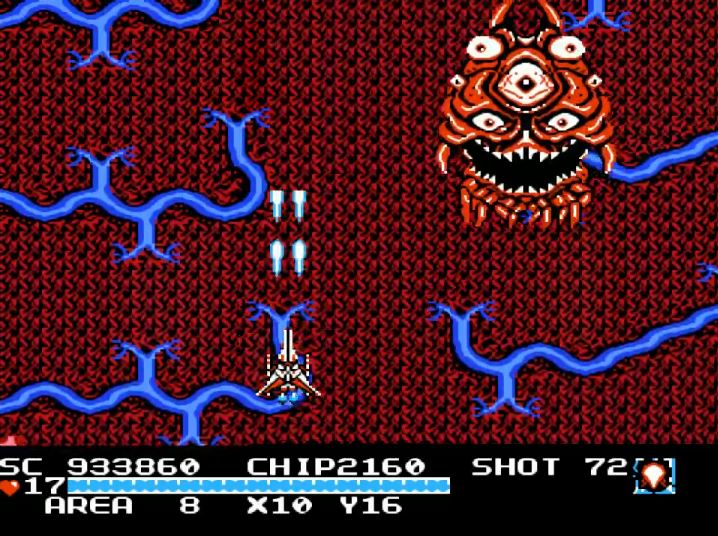
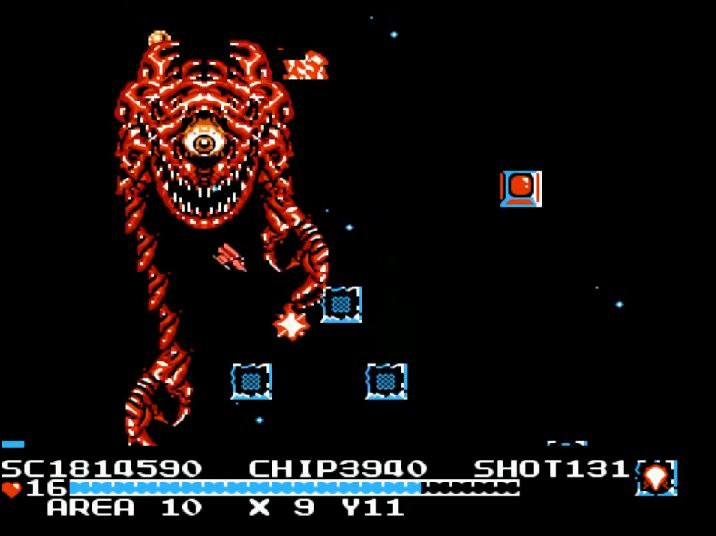
Ahhh the return of Grimgrin. This time he’s blue, and actually not quite as hard as Grimgrin the Red. Never the less, he remains a doggedly persistent SOB who will simply. Not. Die. It’s madness! First he acts like a perfectly normal seven eyed beast:
Then his eyeballs explode and he begins to get testy:
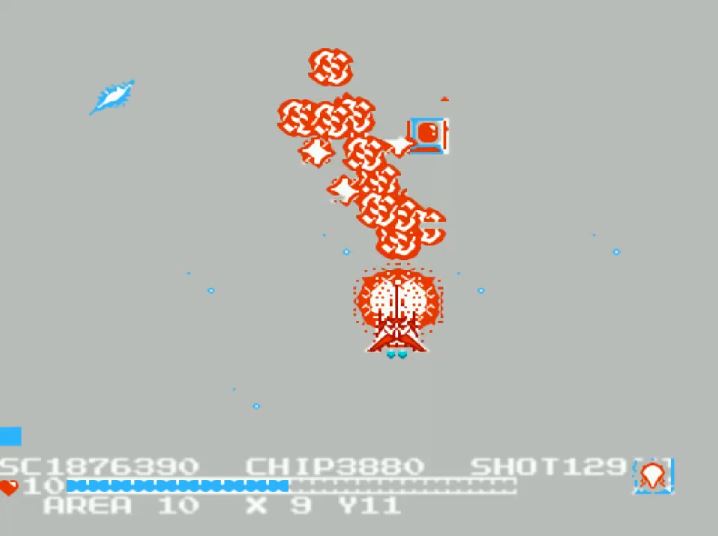
And before you know it, Grimgrin is a raving, psychotic, orange demon from the nether worlds, spewing chunks of himself at you in a suicidal rage of kamikaze like fury:
Make the fireball your friend and keep those power ups coming and one way or another (maybe after 10 tries) you’ll finally take him down. And whew, what a fight.
Area 9 and the Desert of Metrosexual Jellybeans
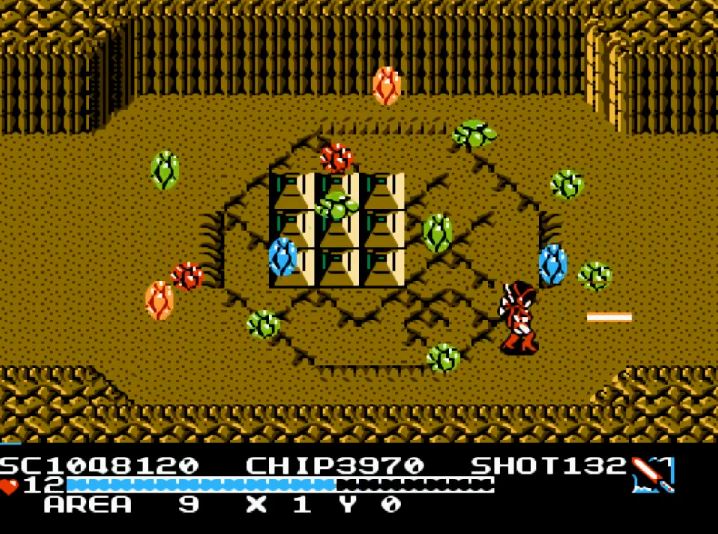
If you managed to pop Grimgrin’s seven eye balls, it’s time to head to “Area 9” and what can only be described as a rather desolate looking Desert area filled with mostly colorful, annoying enemies. As a matter of fact, many of the enemies here are former Mini-Bosses from previous areas except now they appear as regular run of the mill antagonists. For many of these creatures it’s simply best to avoid them if possible, collect what items you can find and move on.
Corridor 9 and the Land of the Skulls
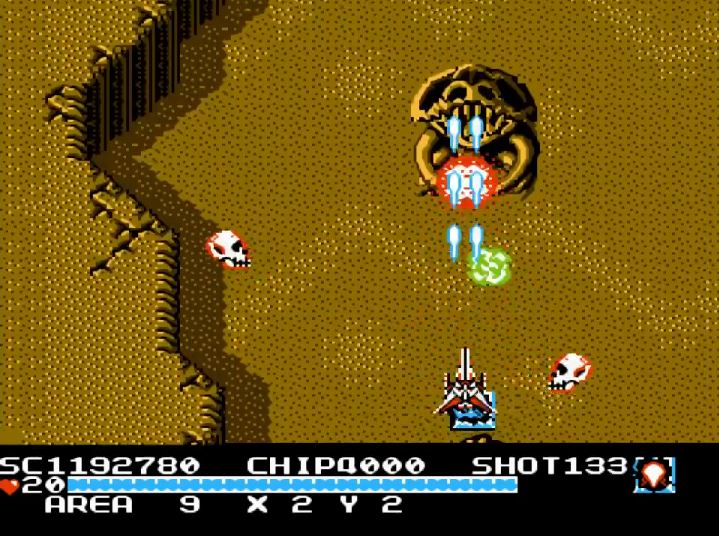
So once you get tired of fighting all the multicolored jellybeans hopping and bopping about (no doubt pushing the NES’s 48 color palette to its limit in the process) it’s time to head to Corridor 9. Once inside you should immediately notice something sinister rising up out of the desert floor. Skulls! And skulls of all kinds! Dinosaur looking skulls, Neanderthalic looking skulls, big alien looking skulls billowing plumes of small, eerily human looking skulls. Too many skulls!!!!! I’ll never forget the first time I entered this corridor, it was probably when I was in my early 20’s. I recall being swarmed by a hoard of enraged skulls, buzzing like a cloud of hornets all around my ship before promptly being vaporized. What I’m trying to say is that these Desert Corridors are no joke. Blink at the wrong time and Alyssa and her alluring craft are toast. But at least you have a new, epic sounding tune to help you through the madness:
“Wasteland Sector Corridor”
To play the media you will need to either update your browser to a recent version or update your Flash plugin.
Keep fireballing your way through the nearly infinite number of calcium deposits and it’s time for a big surprise:
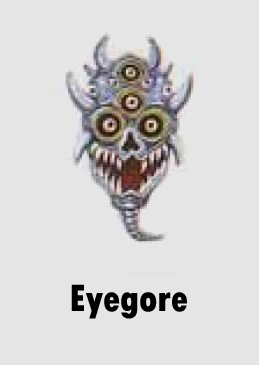
Eyegore! Aka, another giant skull! Frankly I’d say he looks like Skeletor and Medusa’s long lost love child. Eyegore is no pushover either, he has a staggering amount of fire power pulsing through that thick cranium of his in the form of huge laser beams and an army of thoughtless skull drones. Dodging the drones is impossible and really your only chance is to equip Alyssa’s most powerful weapon and hit him straight in the noggin, hoping enough power ups spawn to keep you alive. Get lucky enough and Eyegore will explode like someone just opened the Arc of the Covenant.
Corridor 19 and Even More Skulls
Once Eyegore is sufficiently cremated, it’s time for Corridor 19 and more of the same. Loads of skulls and jumping ninja laser soldiers to help you remember that you are nearing the end of the game. Bring that fireball out and hit them hard until you reach the inevitable and familiar alarm of terror, reminding you that after every long fight, there is an even longer fight.

And speaking of a longer fight, Bombarder is back. As Bombarder the Red that is. He’s faster, redder and has a litany of missiles to fire at you. His phase cloaking device is also in full working order so try to keep up with him as he zips and zaps around the screen.

Luckily, Bombarder isn’t much of a challenge even in his more evolved form. Have patience and hit him hard in the short seconds he is visible and he will crumble to pieces without too much pain.
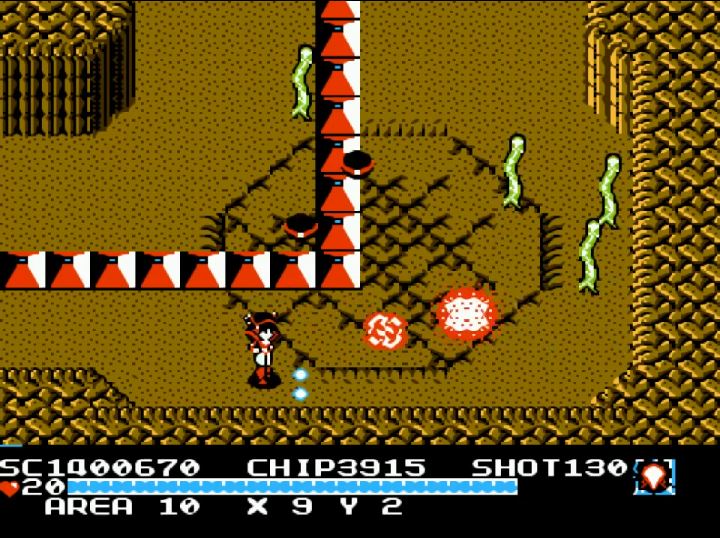
Area 10: The Final Stretch
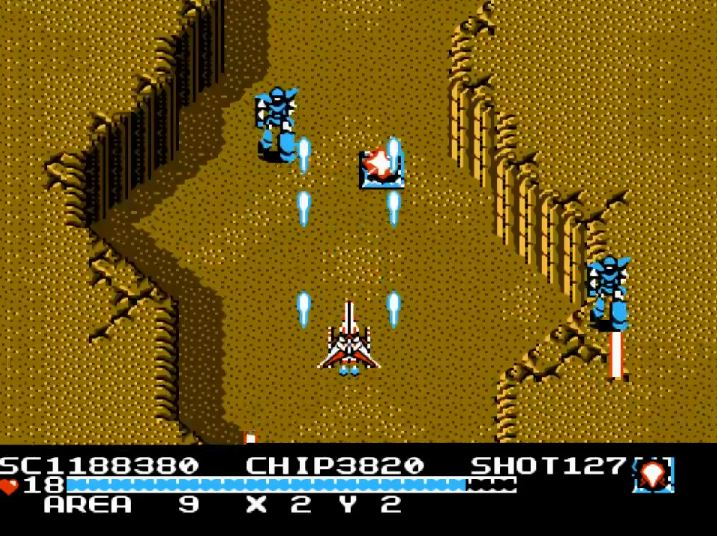
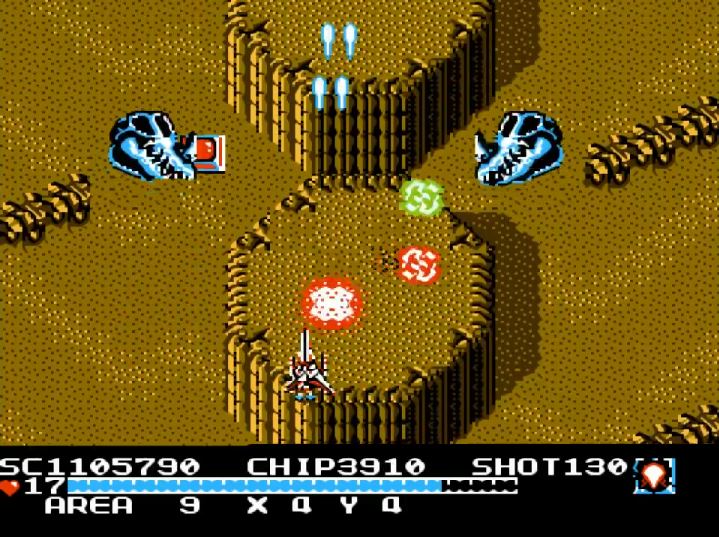
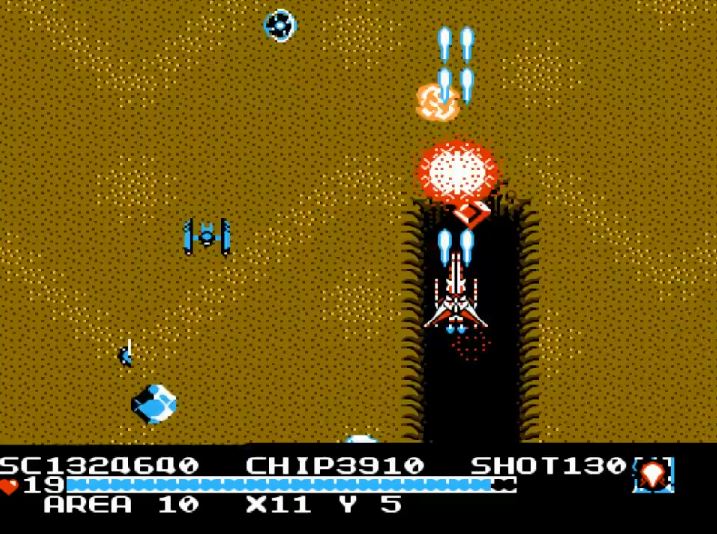
Finish Corridor 19 and it’s time to head north to “Area 10.” And if you thought “Area 9” was a challenge, “Area 10” bumps it up an additional notch. We have another desert themed area where you will find the two hardest corridors in the game and one of the hardest bosses in the game. Not to mention a large and dangerous over world to explore complete with tape worms and resentful dinosaur skull Mini-Bosses. Heck, they even gave the area its own sinister sounding tune to set the mood:
“Wasteland Sector”
To play the media you will need to either update your browser to a recent version or update your Flash plugin.
At this point Alyssa has most, if not all of the upgrades available in the game and exploring the over world is simply for the purpose of “Completists” like myself. So bearing that in mind, it is time for Corridor 10.
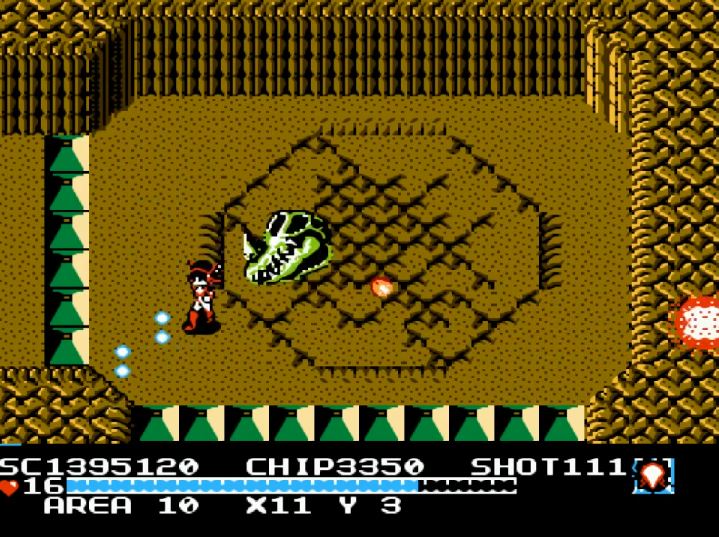
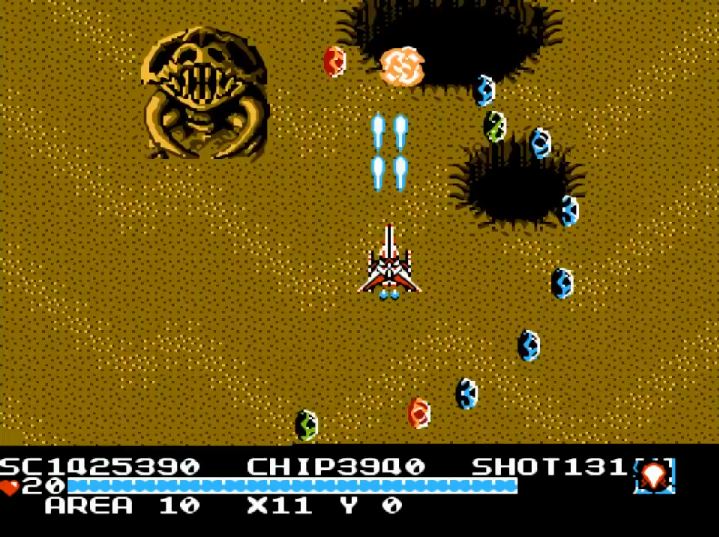
Corridor 10 and the Second Hardest Boss
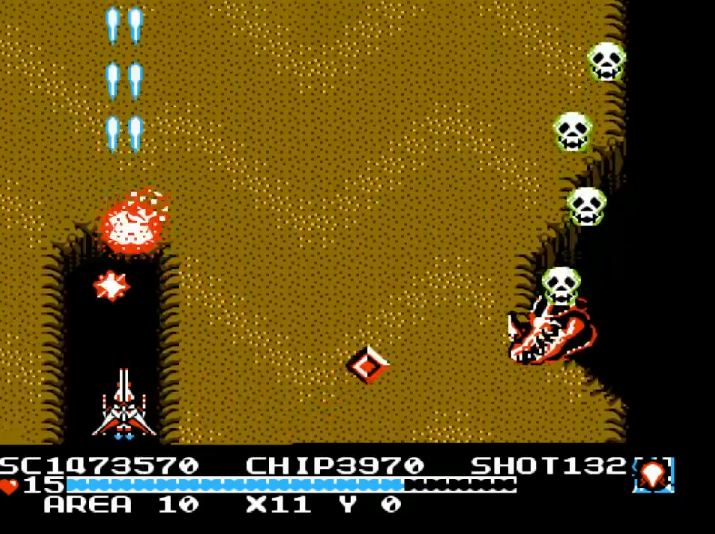
Head on over to Corridor 10 and it’s time for another long ride through skull mountain. This corridor is FAST and is also the longest in the game. It hits you with an almost constant barrage of asteroids and skulls of all shapes and sizes. Couple that with the laser ninja soldiers, crystals, spores and angry trench moles and you have one hell of a difficult ride. But if you thought that was bad, wait until the sirens blare and the boss rears his ugly… skull.
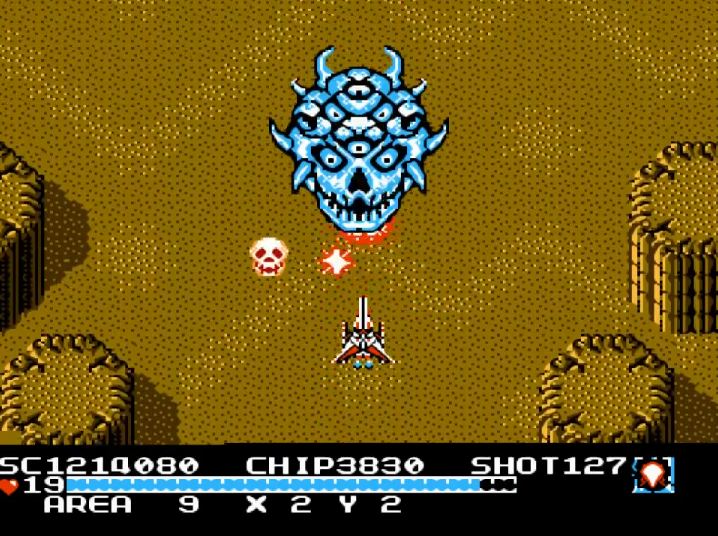
Once Alyssa hits the magic button and the afterburners simmer down to normal speed, it’s time for Eyegore, the Red!
He’s back and harder than ever. But what worked before will inevitably work again after a sufficient number of failures. Hit him head on with your fireballs blazing and he’ll crumble to calcified bits.
Corridor 20 and the Last Hurrah
Finally! Corridor 20 is upon us and we are raring to go. This corridor is basically a carbon copy of Corridor 10 except strangely kinder to the player.
Blast your way through the last of the skulls and an old adversary will be there to greet you:
Yes, Clawbot is back, for the third time and he’s not happy about it (reflected in his crimson red suit of armor). Hit his claws where it counts and avoid his Deathstar blasts and he’ll be dead before the Emperor hits the bottom of the well Vader tossed him in.
The Final Corridor and the Relentless Boss Brigade
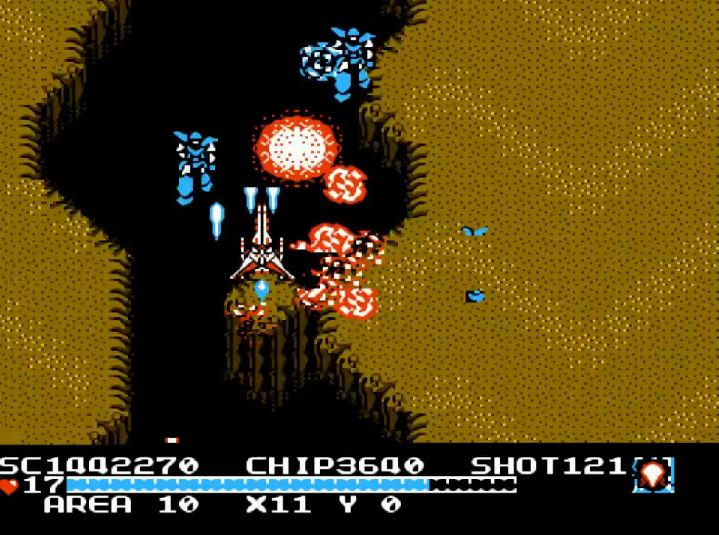
This is it! We are finally here! The epic conclusion is upon us! The final corridor awaits and Naju is going to heave everything it’s got into one final assault on our scantily clad cyborg, Alyssa. You will find the final corridor slightly off the center of the map in “Area 0.” A once mysteriously vacant room now houses the final door to Alyssa and Earths salvation. Are you ready? After 6,500 words I sure as hell am! Let’s do this!
Now, what epic shooter would be complete without a massive boss reboot at the end? “The Guardian Legend” gives you that in spades. You get to re-fight 6 bosses from all walks of the game, all in a row and all balls to the wall. I’m ready, let’s go!
“Final Corridor”
To play the media you will need to either update your browser to a recent version or update your Flash plugin.
FLEEPA! BAM!!!!!!! SASHIMI!
ZIBZUB! BOOM!!! CALAMARI!
CLAWBOT! POW!!!!!!! SCRAP METAL!
OPTOMON! BANG!!!!!!!!! CABEZA!
GRIMGRIN! POP!!!!!!!!! CONJUNCTIVITIS!
BOMBARDER! ZING!!!!!! BOMBARDED!
Quick, Alyssa! Naju is crumbling! Make your escape! NOW!!!!!!!

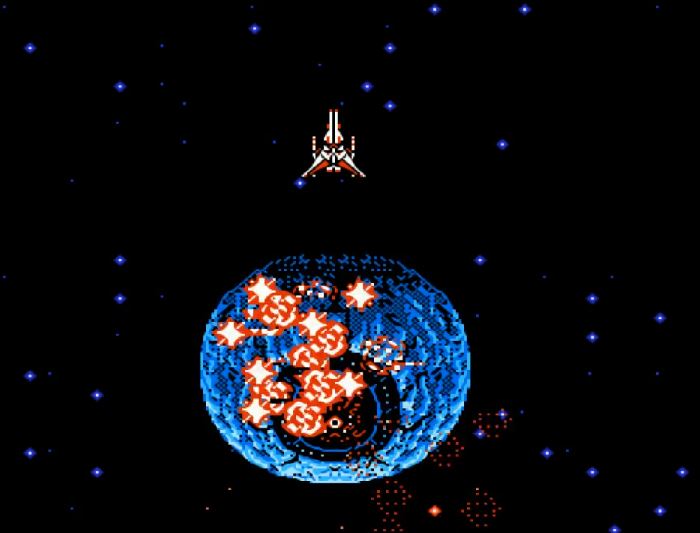
And all is quiet. Alyssa finds herself alone, drifting through space, homeward bound to a distant, liberated Earth. The stars are bright and the mood is serene. Peace has ascended into the scene and all is calm in space.
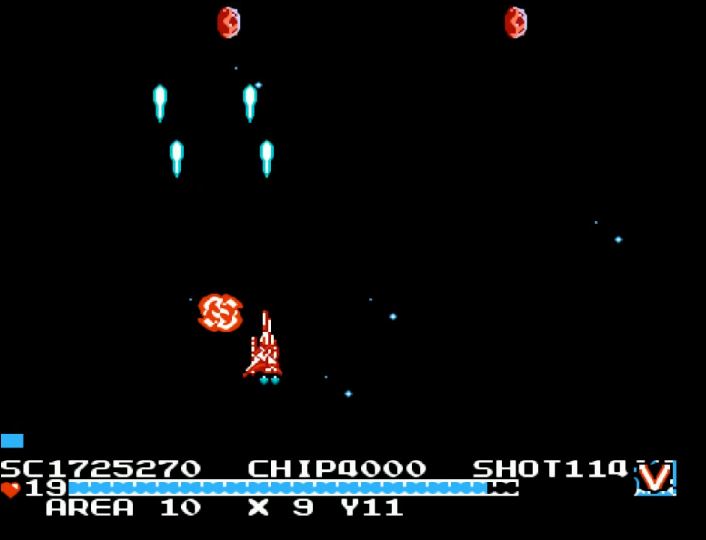
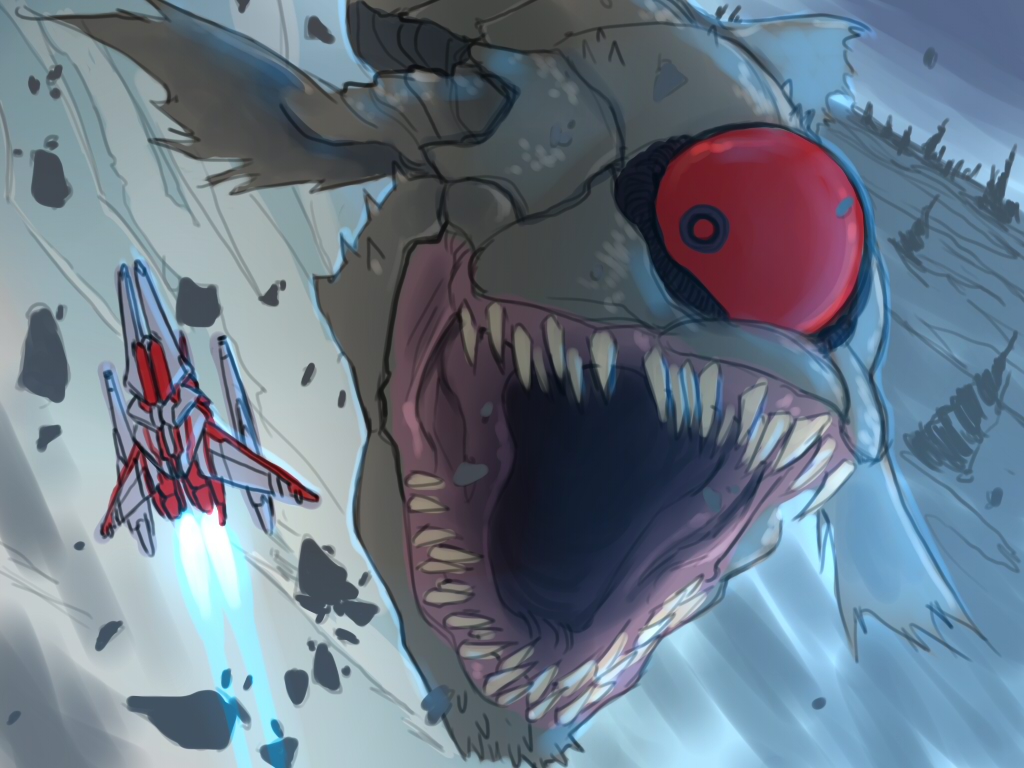
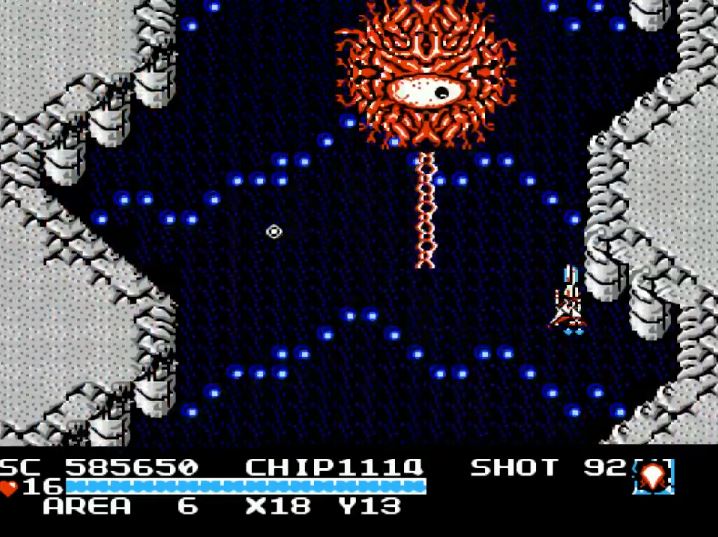
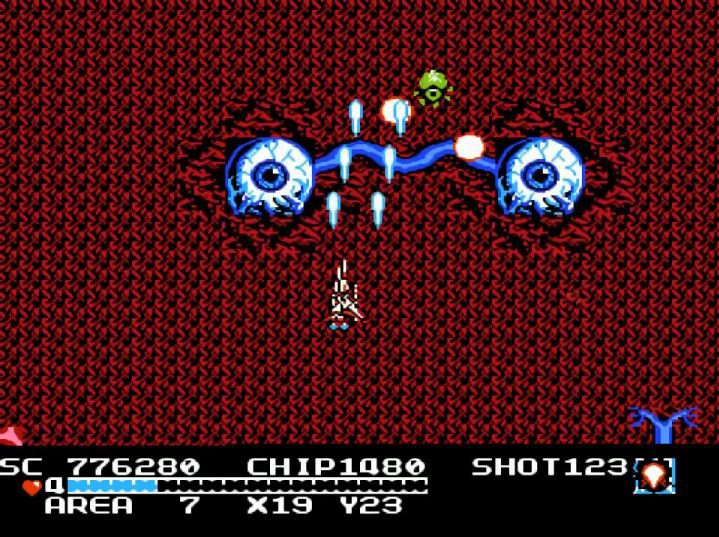
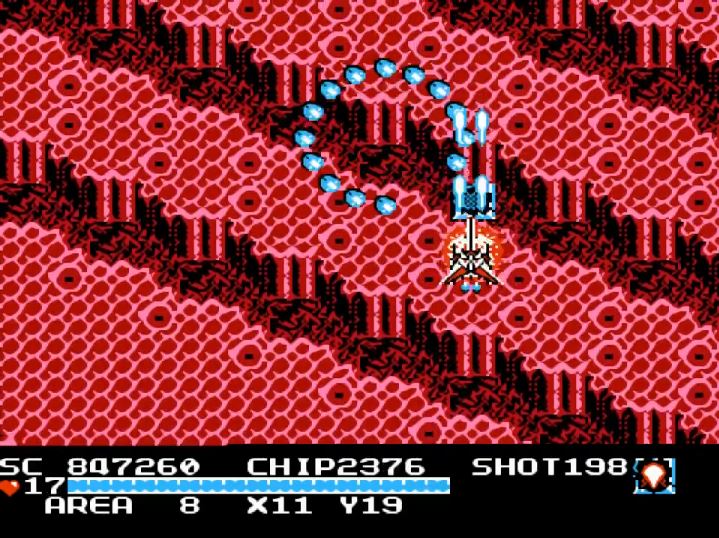
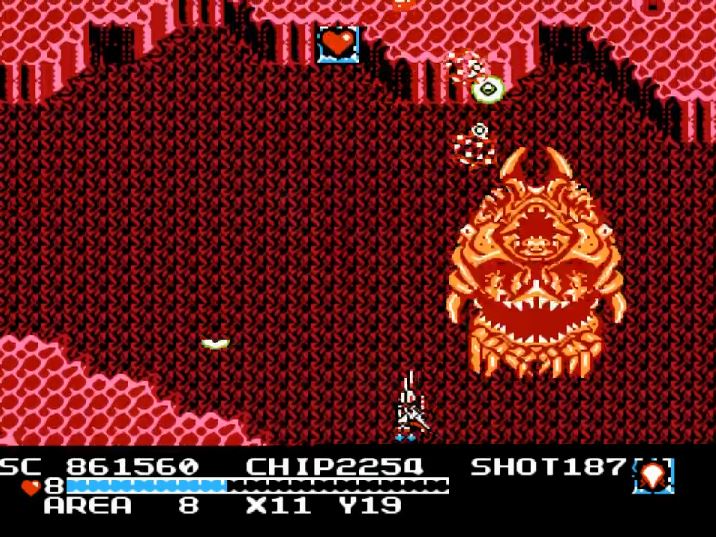
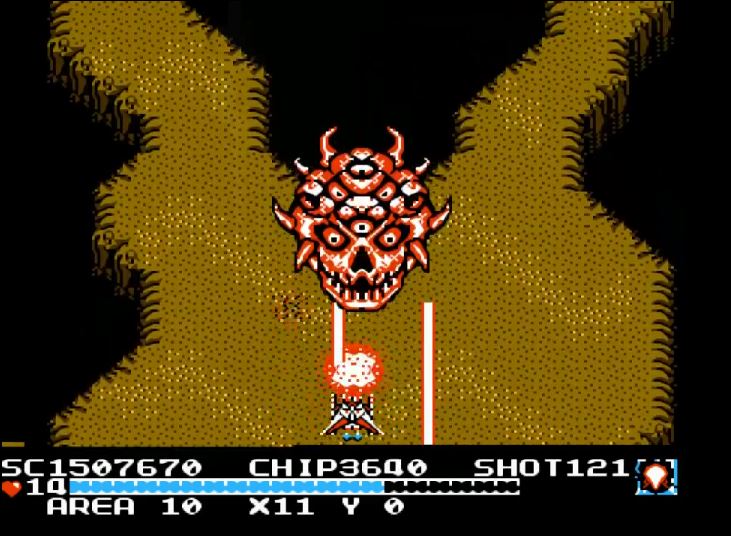
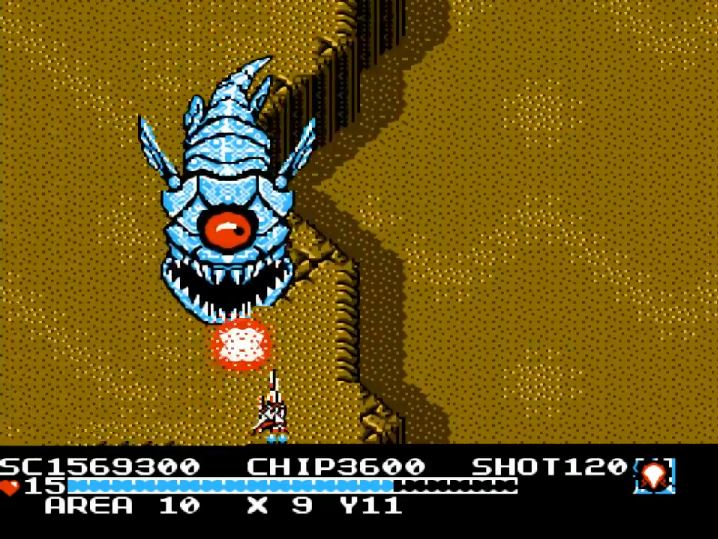
But what is this? Some pesky, bothersome asteroids? No doubt debris from the fallen Naju. A small price to pay for such a heroic deed. But the asteroids are clearing and a chill runs down Alyssa’s metallic spine. This fight isn’t over. “It” has arrived:
Knife sharp teeth with a perverse grin, one solid red eye and a tangle of knotted flesh. What is this appearance of evil? It has no name and It has no reason to exist anymore, save for vengeance. After all, Naju was destroyed and all its villainous symbionts with it. But It is real and It mounts an attack. From Its arms It spews missiles. From Its eyes It squirts… tears? Tears at having Its home and progeny destroyed? No time for sympathy. Alyssa springs into action, her level 3 fireball lighting up space like a fiery red giant. Its arms are short, but soon become long, reaching for Alyssa with an unbreakable grip of horror. Grasping for the being that has destroyed Its descendants.
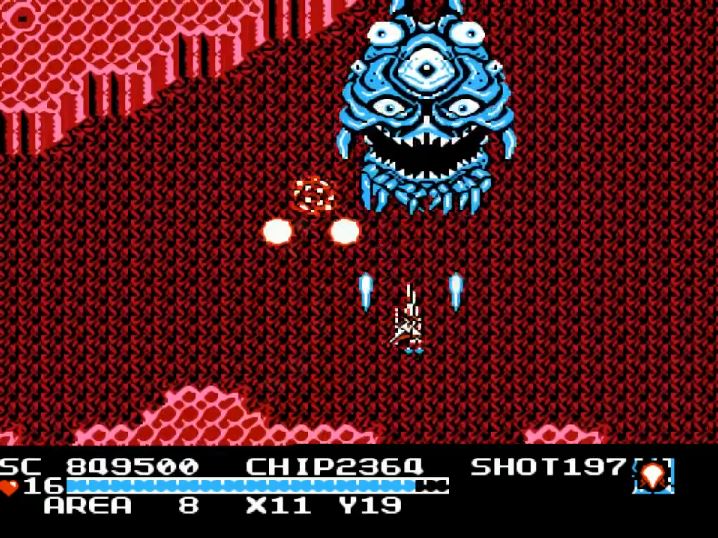
But Alyssa persists and evades Its death grip. Riding the solar wind to the pinnacle of Its fury. Blue becomes orange and It becomes angry. A hint of desperation joined with the will to survive, It strikes even harder at Alyssa this time. She blasts ever more with her fiery weapon, while a horde of Its imps spring forth to avenge their fallen brethren.
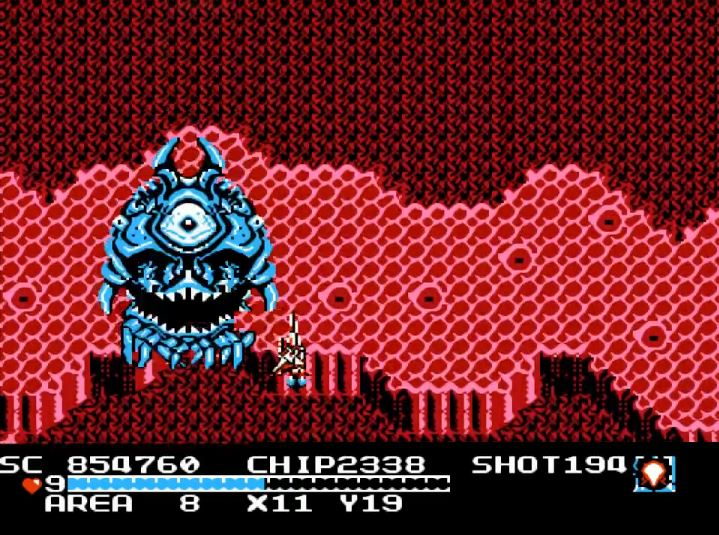
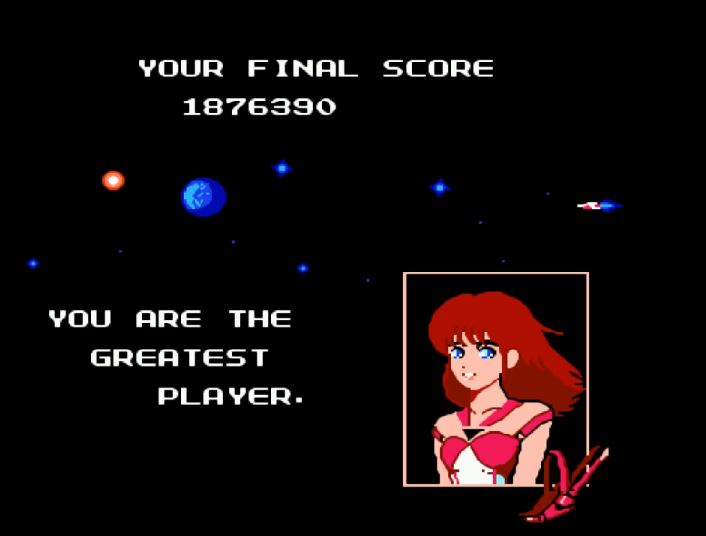
Alyssa is bruised, but her will remains strong. Orange becomes red and It becomes desperate, a crush of hornets defending their nest from the exterminator of worlds. Alyssa dives to the left, the right, head on and fires a ball of streaming energy that would make a fusion reactor proud. A white hot detonation and a blast of light and all is once again silent in the black of space. It has lost. And you’re…… no….. Alyssa’s journey is complete.
“Game End”
To play the media you will need to either update your browser to a recent version or update your Flash plugin.
Damn Right
Conclusion
And this concludes my epic tale of “The Guardian Legend.” It was nearly 3 months in the making and by now, it is no secret that this game is incredibly special to me. It remains atop a perch in my own personal video game echelon. There are few other games I regard this highly so I found it only fitting to create something that truly celebrated the game. A eulogy if you will. More than simply a walkthrough, game play video or a speed run, (although God Bless the guys that have done them, you are my heroes!) I truly wanted to write an article that encompassed not only my personal feelings for the game, but also created an experience that truly showcased the greatness of the game itself. My goal in conceiving this article was to produce something that no one had ever done before in regards to “The Guardian Legend.” I believe I was able to accomplish that here and hope that someone, anyone who maybe hasn’t seen or played this game before will do so as a result of my work. If that happens, then my mission is complete.
Notes and Thanks
I have several sources I used in the creation of this massive two part article and I would like to thank them here:
THEGUARDIANLEGEND.COM
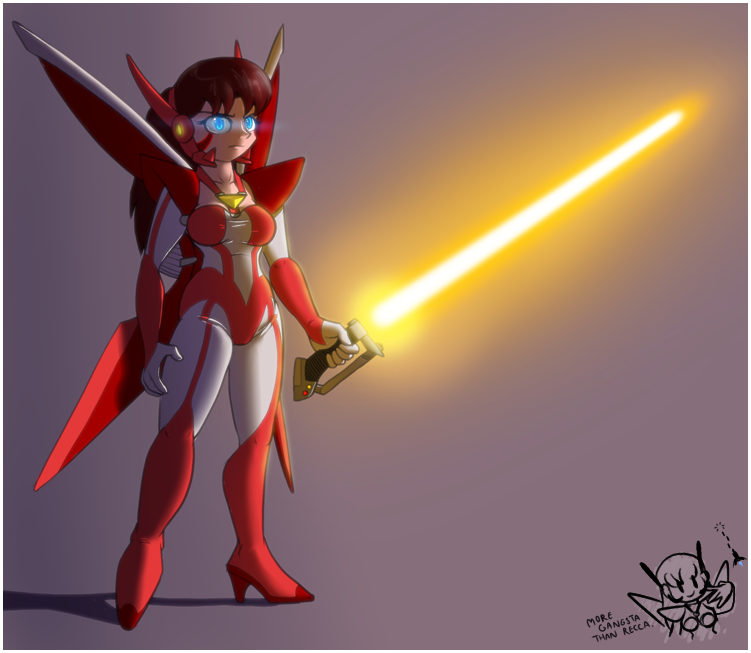
If you haven’t noticed by now, every time I mentioned the words “The Guardian Legend”, I linked to this wonderful website. Please, if you have made it this far and haven’t visited the website, do so now! There is some great fan art (a lot of which I showcased here), all of the games original music, a really cool interactive quiz about the game and an active forum! There is a great little community there that encouraged me on this mission and I thank all of them for it.
I would also like to thank the site creator and operator “arseniy” for helping me with my research and for creating such a great tribute site. Bravo!
Team Spooky
I would also like to thank Team Spooky for their absolutely incredible 12 part play through of “The Guardian Legend.” Without it, I would not have been able to write this article the way I wanted to.
Aggro Sky
Aggro Sky grew up netting tropical fish and eating mostly home grown organic fruits and vegetables. He received an Atari 2600 from his uncle when he was a mere 3 years old and progressed on to pretty much every major gaming platform since. He would like to inform everyone that the Sega Genesis is "God" and that you can follow him on Twitter @zfunk007 or read some of his other writings on Gamers Only Older or his blog at: http://zfunk007.tumblr.com/ which contains links to all of his work. He resides in sunny South Florida with his wife and 3 cats and has no plans for procreation.
See all posts by Aggro Sky