PC Master
Let’s Build an N64-PC – Part 1
From time to time I get bored and decide I need a project to spice things up. So, I’ve decided to take the time to put a full PC inside an N64, and dedicate it entirely to emulation. So, let’s walk through what I plan to do.
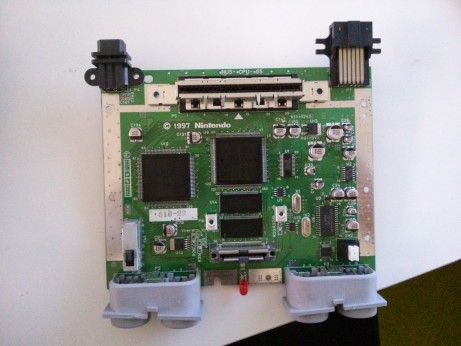
First thing first, I need an N64. Lucky enough, the folks over at 1UpGames were kind enough to donate a broken unit to me. I’ll of course have to gut it, so that I can fit the computer components inside.

The broken N64.
But before we get to that (which will be covered in the next post), let’s go over exactly what I’ll be using to build this N64-PC.
First, I’ll need a pair of gamebit screwdrivers that allow me to open the N64. Nintendo doesn’t use standard screws on the exteriors of their old consoles, so I snagged a pair of tools from Amazon for about $10. This will let me open the N64 itself, and even the cartridges. You can see the tools above in the photo of the N64 (blue handles).
While I was originally going to use something along the lines of a RaspberryPi to emulate games, research revealed that they’re just not powerful enough to do N64 emulation. NES and SNES games are fine, but anything newer just crawls. So with that, I decided I’d get an ECS-NM70TI thin-miniITX board. Long story short, it’s a very small motherboard (170mm x 170mm), and it’s only 20mm high. This means it will fit in the N64, thanks to an embedded CPU, it will provide me with enough power to emulate everything up to the Dreamcast. Even better, it doesn’t require a bulky computer power supply, and will run off the power adapter that came with my Chromebook.
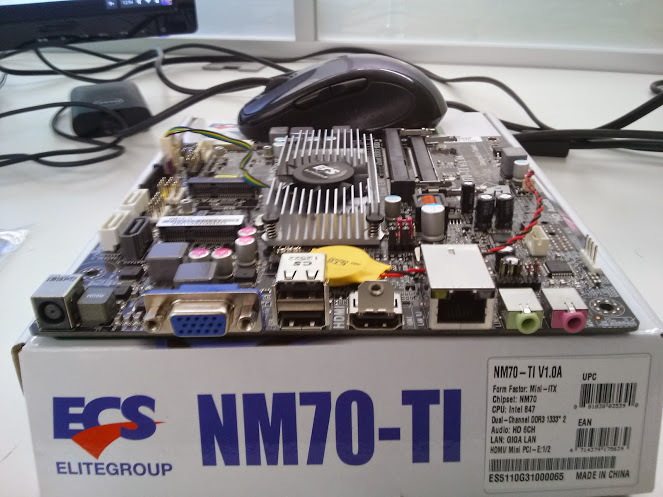
The incredibly small motherboard.
On top of that, I ordered 4GB of RAM and an mSATA SSD. Mini-SATA harddrives are incredibly compact, and the specific SSD I bought measures in at 2.00″x1.18″x0.15″. This means that I will hopefully be able to mount it within an N64 cartridge, creating a hotswapple harddrive through the N64 cartridge port. You’ll have to still put in a cartridge to use the N64-PC.
The most complicated aspect of the whole PC is that I plan on replacing the front controller ports on the N64 with USB ports. I want it to remain the same stylistically though, so I am going to design and 3D-print replacement ports. They’ll look the same, but have USB connections instead of N64 controller connections. I’m lucky enough to have access to a 3D-printer at work, so I’ll print them off as soon as I get them designed. That said, I’ve never done this before, so there will be a degree of trial and error.
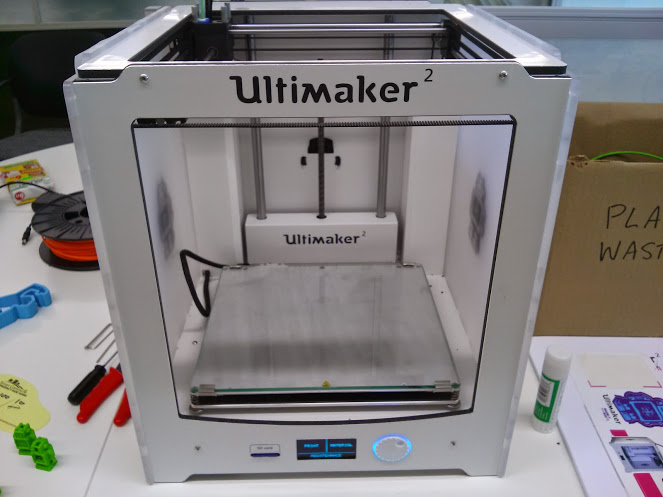
The 3D printer.
So with that all said, I’ll begin construction of the N64 soon. I’ve got the motherboard/CPU, and am just waiting on the RAM and SSD to arrive. In the next post, I’ll go over the gutting of the N64 and you’ll get to see what’s inside.
Jason Lamb
Jason is a PC Gaming aficionado from the Great White North. You can follow him on Twitter @jasonlamb.
See all posts by Jason Lamb